Beginnings

We are already into the fourth week of school and the busyness does not slow down! Hard to believe that on this day five years ago, I moved to Istanbul. What a wild adventure it has been!

I wanted to share some of the middle school projects from our first weeks. It has been two whole years since I taught middle school, so it will take some getting used to again. I am glad I keep a blog because I have a record to look back on of all the wonderful projects from years past.
20180907_161359
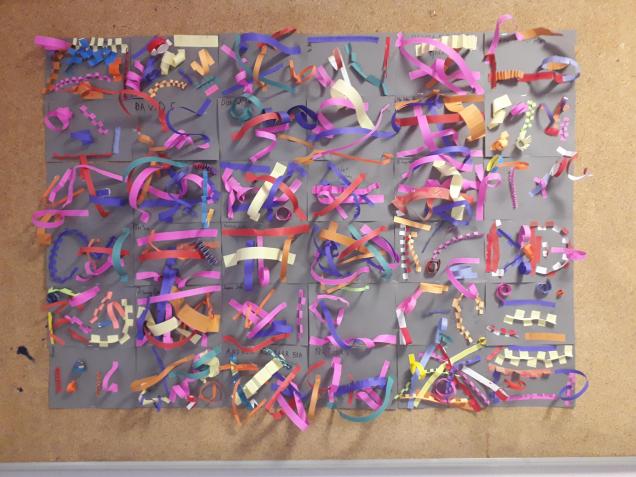
The fifth and sixth graders About Me sculptures

We started off the year with making portfolios- I will have to remember to share some photos!

The new middle schoolers, the fifth and sixth graders made paper line sculptures. These are hanging up in the hallway across from the art room. Each line represents something about the artist; for example, an orange tab if you have been on a train, or a green spiral if you like ayran (a Turkish yogurt drink).

This project may look familiar, it is typically one that I do with kindergarten (see here and here) but I have learned that it works for many ages. Thank you to Cassie Stephens once again for the inspiration!

Fifth through eighth graders also made paper foldables for the elements of art; this was information I knew I wanted them to get down from the beginning!

Here are a few of the finished foldables. Each of the seven elements of art were to be written in an illustrative way; to add meaning to the element. Inside are definitions for each element and further drawn examples.

This slideshow requires JavaScript.


Oceania Masks

Our school celebrated international cultures week mid-April. Within the student body, we have representatives from 24 countries! It was a busy and exciting week with a whole-school assembly, musical performances, cultural games and a potluck lunch. Amidst the flurry of special activities throughout the week and the themes of celebration and diversity; we looked at masks.

We talked about the reasons why people wear masks and where they get their inspiration from. We looked at masks from Papua New Guinea, discussing the colours, shapes, patterns and textures we observed. We also discussed the differences of symmetry and asymmetry in the designs.

Everyone started with a cardboard base. We talked about building a relief using different textures, shapes and layers.

Once the masks were complete, we painted them. The final step was to add pattern and detail with pastels.

This slideshow requires JavaScript.

Textile Patterns from Ghana

After our unit in the caves, we flew off to a new country in West Africa; Ghana.

In first and second grade we looked at Kente cloth patterns

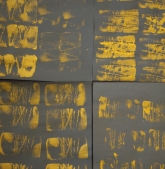
We started with making two patterned papers.

img_4775.jpg

1. Printed gold patterns on black paper- we made printing blocks by wrapping twine around sponges

2. Painted geometric patterns using colour, line and shape


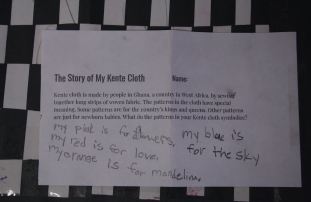
Once these papers were finished, we wove the two patterns together to create a new and intricate pattern. The black paper became our warp and the coloured was the weft strips. Weaving always goes over great- I did it with both groups last year, so this was review for most. We talked about how Kente cloth is used to make new clothes for special occasions and thought about what occasion we would make our designs for; a few students wrote artist statements about the meaning behind their finished pieces.

IMG_4904

Third through fifth grade focused on the Adinkra symbols found on Kente cloth

We looked at examples of symbols and their meanings; and watched an artist through the process of stamping a design on cloth.

I gave the students sheets of ideas of existing symbols and encouraged to make a design of their own. They glued foam shapes onto a cardboard base.

The printing of these designs was exciting! Even after printmaking with classes this long, I still strive to make the process run more smoothly. I set up a long table in the middle of the room for inking, and each student at the remaining four tables had a number. When it was their turn, students inked their stamps in the middle and then returned to their tables to print. I encouraged them to rotate the stamps to create variation in their design and also incorporate a second symbol.


Relief Assemblages


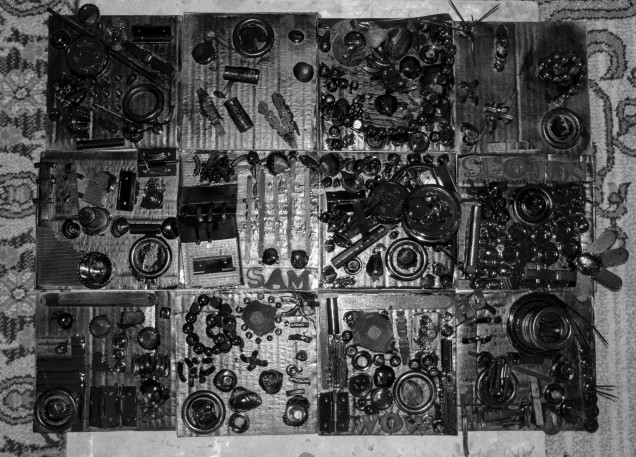
This was our final project in fifth grade, following bootcamps in the art elements and principles. We looked at Louise Nevelson’s work, trying to identify recognizable objects and discussed the idea of relief and assemblage (sculptures utilizing found objects). I gave each student a square of cardboard, asking them to fill it with an assortment of forms. This was a great way to get rid of those little bits I have been storing: popsicle sticks, bottle caps, pasta, shells etc. I asked them to make sure they filled the whole space, and had areas of both high and shallow relief.
The final step was to spray paint the pieces, unifying all the components together. I was able to get extra time to take the class outside so each student could paint their own piece. It was a lot more fun to have them involved than for me to do it myself. A few of the students said they felt so ‘cool’ spray painting, it makes me want to do a graffiti unit with them next!

This slideshow requires JavaScript.

I photographed each piece as it was drying outside. The paper backdrop with the paint remnants and shadows created an additional element of interest!

IMG_4717
The finished class arrangement of tiles

Artists Communicate: Cave Art

IMG_4614

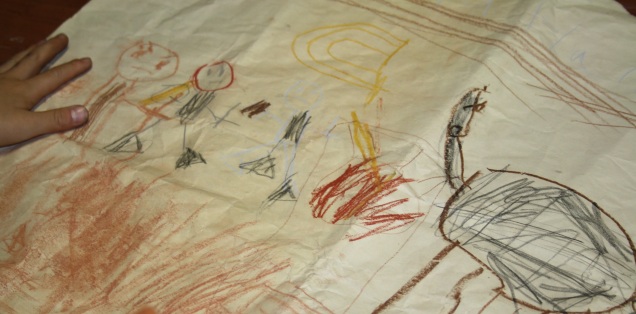
I have had students drawing in caves for two weeks! We are beginning our art through culture units with exploring the very first art ever found.

As students came up for art, they were welcomed into the CAVE. I had all the curtains drawn so the room was dark- except for the images on the projector. I told them we were going on a tour of Lascaux cave in France- the same cave that a few teenagers also explored many years ago and come across something. We watched this video and I asked students to keep an eye out for anything surprising.

After watching, we discussed the drawings we saw. What subjects were drawn? Who do we think drew them? What materials do we think they used? We talked about the people that lived in caves- some of my students have visited  caves in Cappadocia where people lived in the past, and the cave homes people still live in today. We discussed the information these drawings give us about how people lived back then and the stories they tell us.

I gave students scraps of paper to practice drawing with our materials: chalk and oil pastels, crayons, conte and charcoal. I had them start thinking about what was important to them and what story they might want to tell through their artwork.

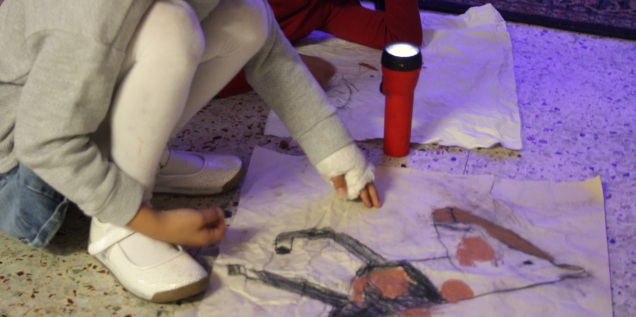
We did our drawings like the cave artists: up against the wall, taped to the underside of a table or chair, or on the floor- and we used flashlights to help us see.

IMG_4612

After practicing and drawing initial ideas, students began drawing on bigger sheets of paper. Most of this paper has been sitting my shelves for quite some time and already shows some wear and tear. But I showed students how to rumple the paper to achieve a more rock-like texture.

Finished drawings need to tell a story or communicate something important to the artist. They also need to demonstrate the following elements of art: line, shape, colour, texture and value. Stay tuned for the display of our finished cave drawings!


Bootcamp: Shape, Space and Form

This week, we reviewed line and texture and learned about the element of shape. We looked for examples of shape in artwork and discussed the differences between geometric and organic, positive and negative shapes. Students then worked on a collage that incorporated both coloured and textured shapes. Finally, we explored how a flat shape can become a form if it is “popped”, bent, rolled, twisted, folded and attached to a surface. First and second created their own abstract paper sculptures with form and texture, while the older students created one form to add to a collaborative sculpture.

Fifth graders used their previous work as examples for each definition.

Dots

This week in kindergarten and Grade 1, we read the Dot by Peter Reynolds- it is a lovely children’s book for the art room! I then had each of the students make their own ‘dot’, and let them choose from a variety of materials, including oil pastel, coloured pencil, markers and tempera paint. As we saw in the book, dots come in many different sizes and varieties, and each of the students’ dots were unique pieces of art (although we did have a few replications!) When each piece was declared finished, I had the student sign their name and I put the dots up for display framed in gold, like the teacher does in the book. It was fun to watch them create with a bit more freedom, although it may well have been a recipe for disaster! I am excited to explore even more with dots this week.


*A week later, I took the students on a trip out to the hallway to look at their pieces on display. I asked each of them to describe the dot that they made, as I absolutely love hearing little ones talk about their art! Here are some of the responses, can you identify which one is which?

What kind of dot did you make?

  • American, with ruffles on it to look like a circle and make it prettier.
  • Swirly.
  • Curly rainbow.
  • A rainbow circle with edges that are blue, but I meant… (this was opportunity for a learning moment to discuss whether artists make mistakes)
  • Crazy rainbow.
  • A Korean flag, different colours and an angry bird.
  • A Korean flag.
  • Rainbow, swirly.
  • Scribble rainbow with four colours
  • A little bit gray and blue, a little bit square.
  • Rainbow and round.

Pastel Mural

12483526_10153176336336073_715558552_n

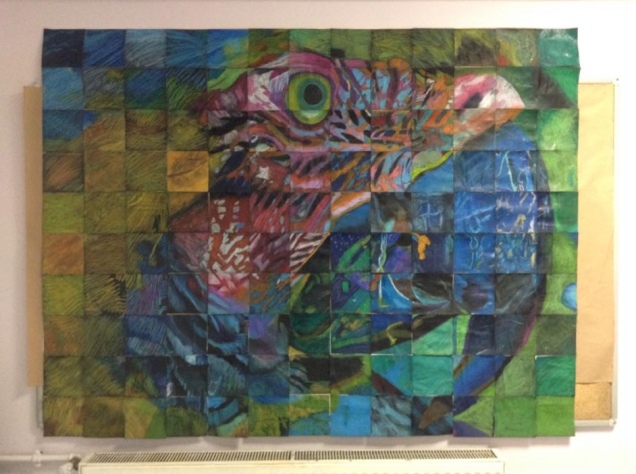
I put this piece together today. It feels good to have something bright and cheerful up on the wall the first day back from break. This was a collaborative work between my seventh and eighth grade classes. I gave them each 2 cm squares cut from a printed photo. Each student did at least two, which they enlarged onto a 14 cm piece of black paper. The goals were to replicate as accurately as possible the colours, shapes and textures we saw. We used oil pastels, having previously explored a range of different texture making techniques in the medium.  I am amazed at how well the piece turned out, and that the edges mostly line up since individuals did not work side by side. None of the students saw the original or knew what they were creating until now.


Colour Scheme Tile Designs

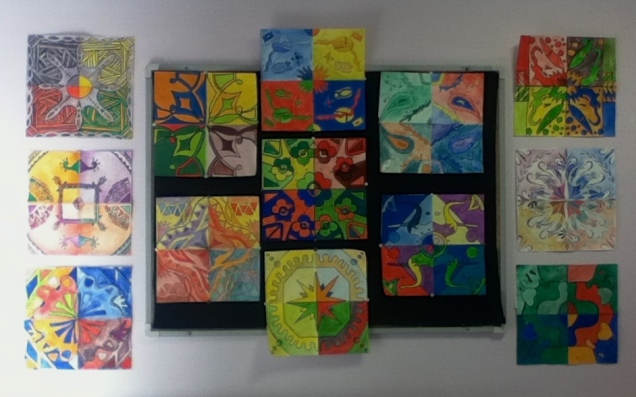
As a first project with a new class of the semester, I had the opportunity to try something new! These tile designs turned out beautifully- it was the perfect project for reviewing several art elements and getting everyone on the same page.

This slideshow requires JavaScript.

tile14

It took me FOREVER to hang these, with an odd number of paintings and a bulletin board that is too small. I take hanging artwork very seriously, perfection is essential for presentation!