This semester turned out to be a bit of a disappointment- I returned in January to find out I had a class of only two students. Then halfway through the preparations for our exam, we went online; only later to find out that the exams are cancelled altogether. To top it all off, this was my LAST chance to teach this class, which I love, due to our school no longer running the program.
Nonetheless, I was privileged to be a part of these students’ creative journeys and I am excited to see where it takes them in the future!
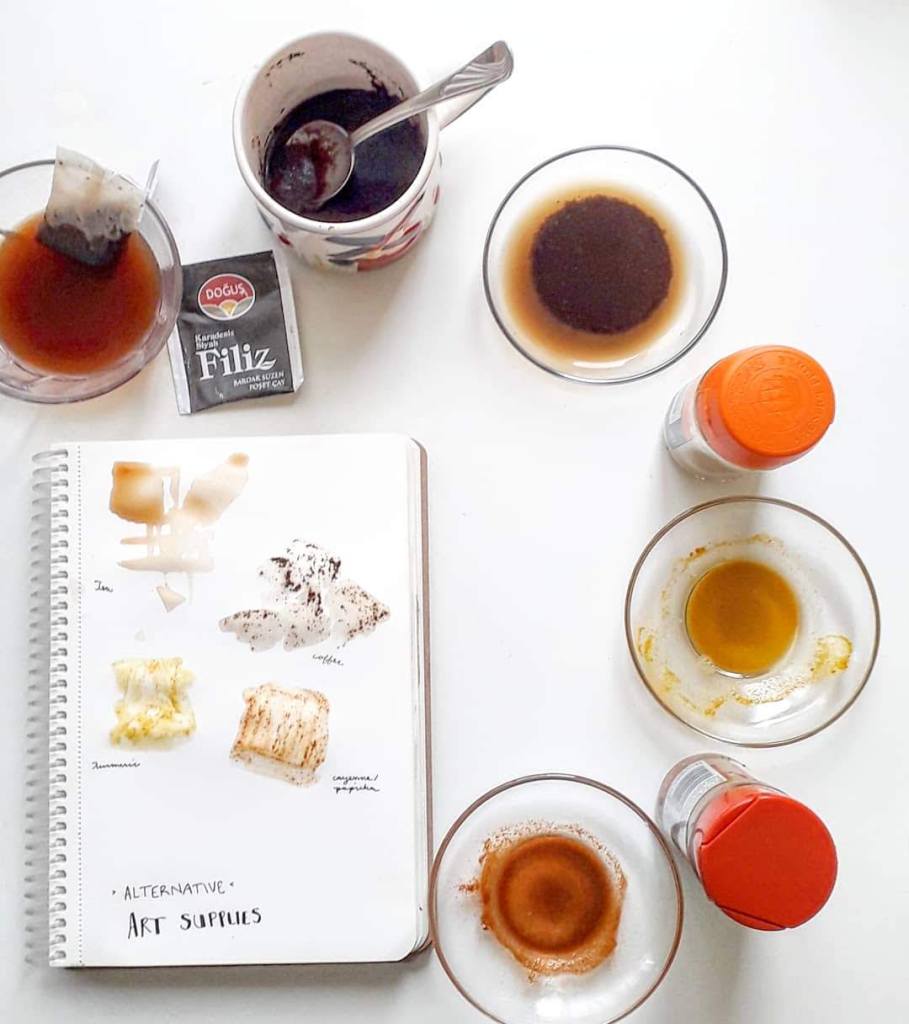
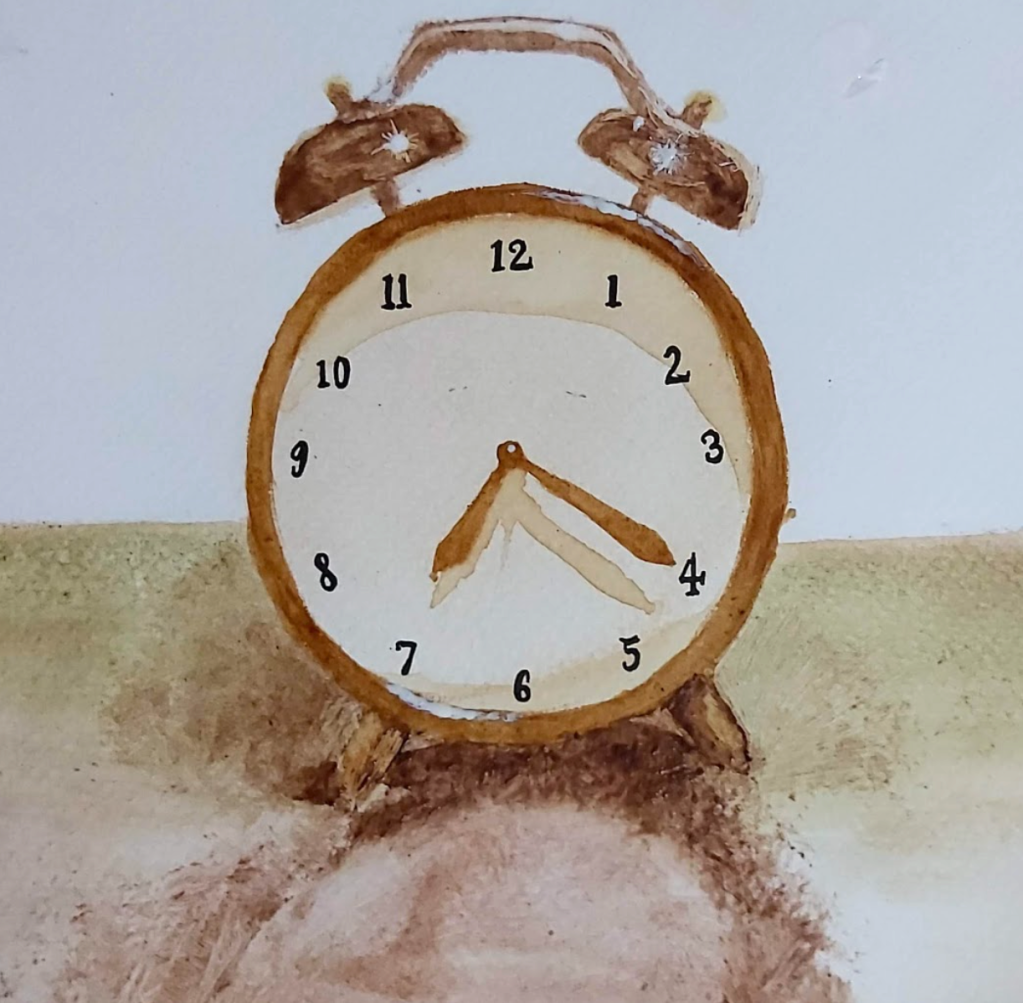
Making Art With Alternative Materials
Student work created with coffee, cocoa, mulberry leaf powder and nail polish!
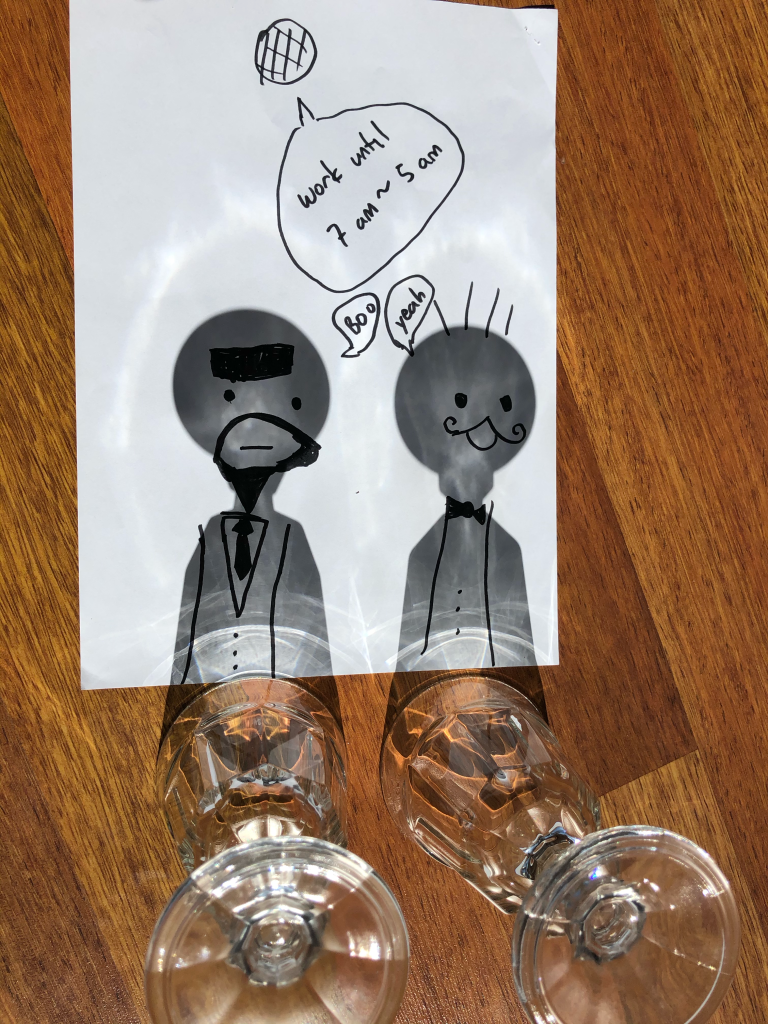
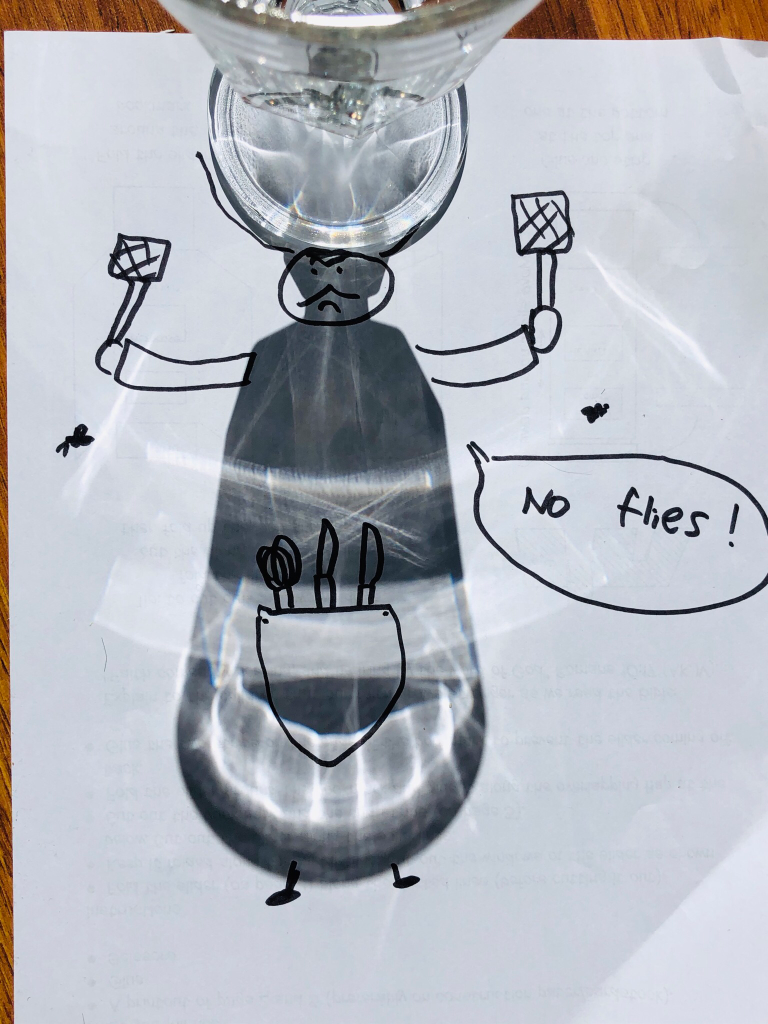
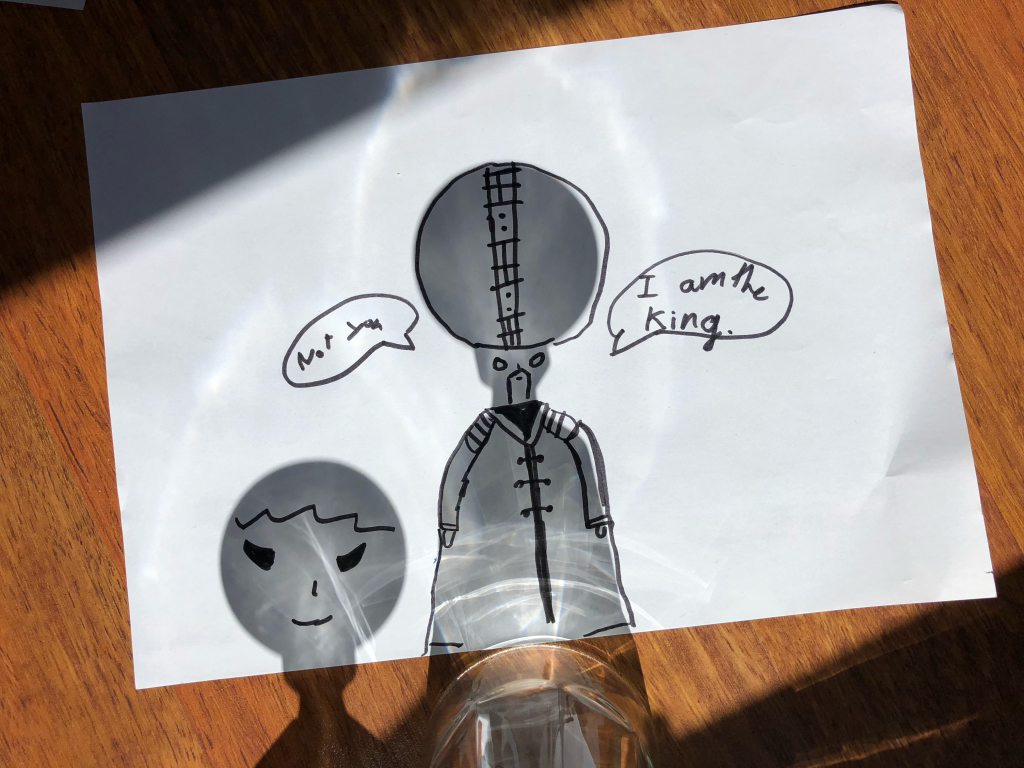
As artists, we are constantly creating and coming up with new ideas. Facing limitations in terms of materials, especially during at-home learning, proves to be no barrier in continuing to make art! I expanded my own horizons in making my first YouTube tutorial to introduce my students to working with alternative materials, click here to check it out.
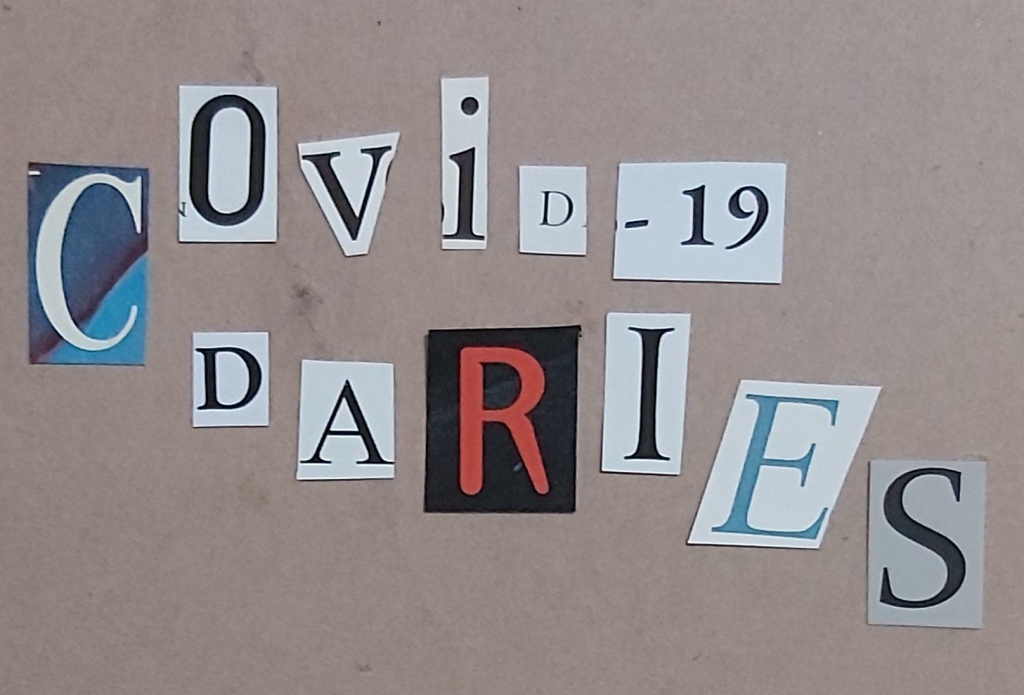
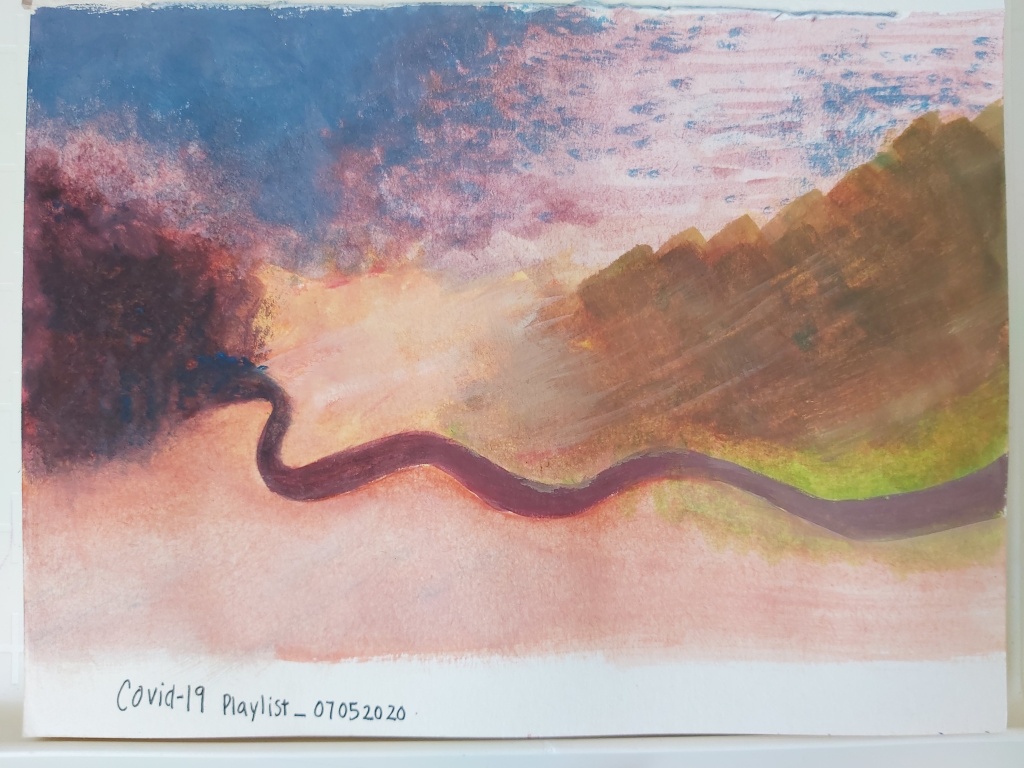
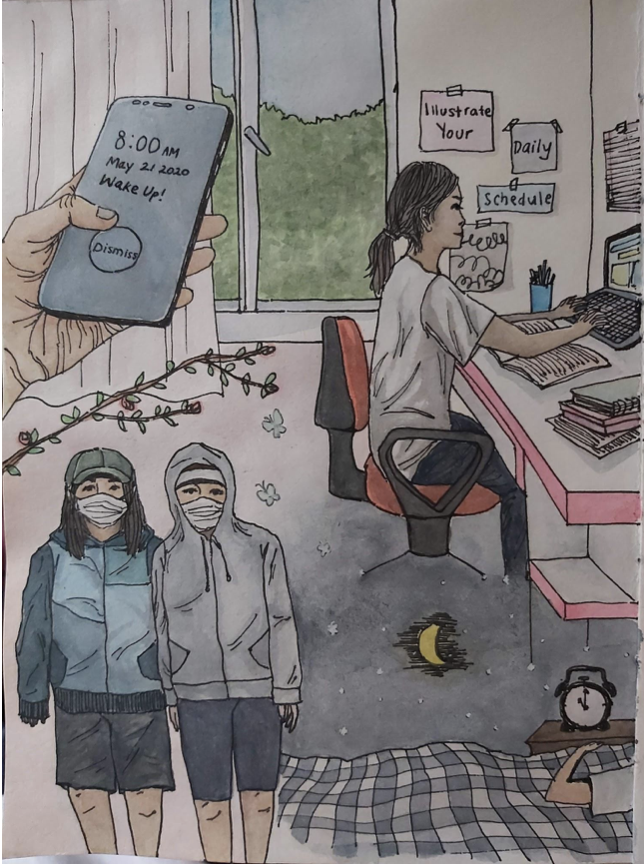
Bookbinding is typically one of my year end activities, in an attempt to recycle old drawings and paper from the semester. I saw artists all over the internet embarking on quarantine projects and thought it would be neat for us as well to create a collection of work from this time (not knowing that our at-home learning would last the entire fourth quarter!) After binding our own COVID Diaries, I gave the students two assignments per week, consisting of one sketchbook assignment (which they chose from a list) and one art challenge, which we started during our weekly class calls. Here are some of my favourite submissions:
The last three weeks of school, we explored different careers in the arts and students again had a choice of projects:
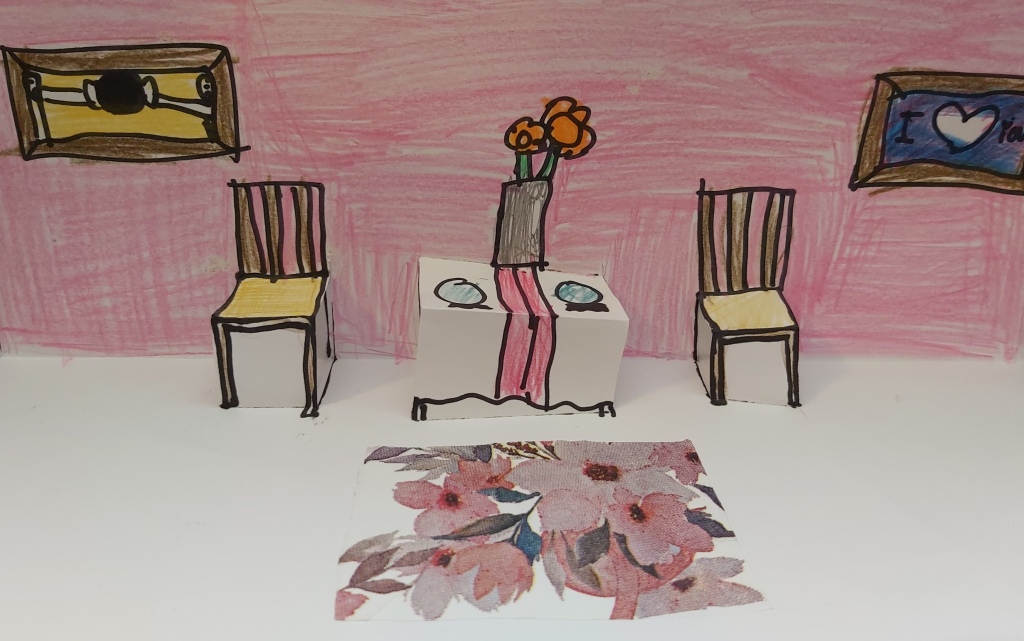
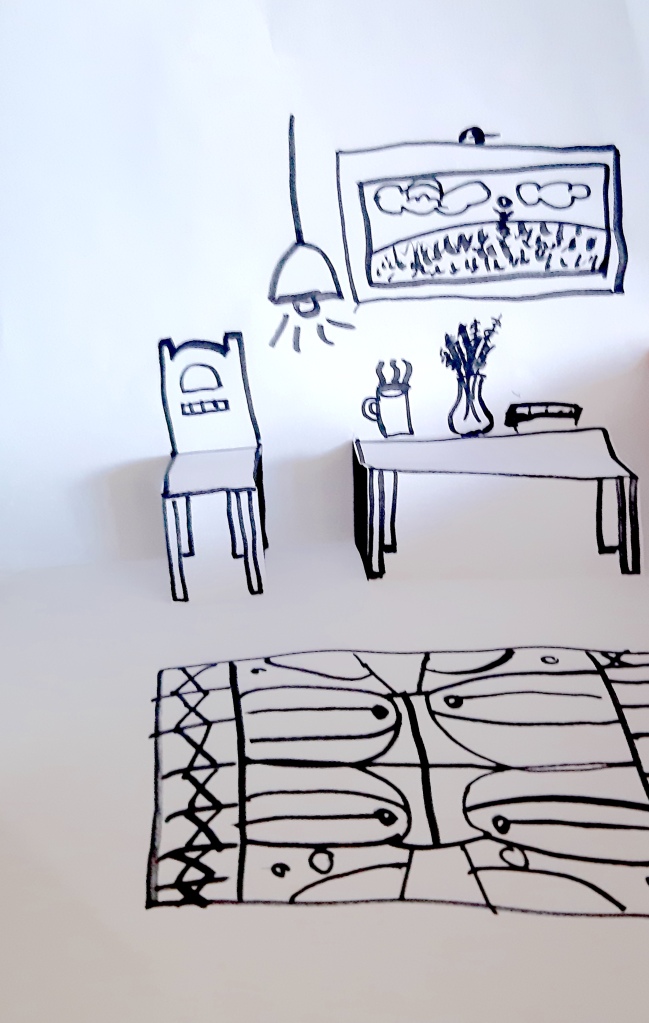
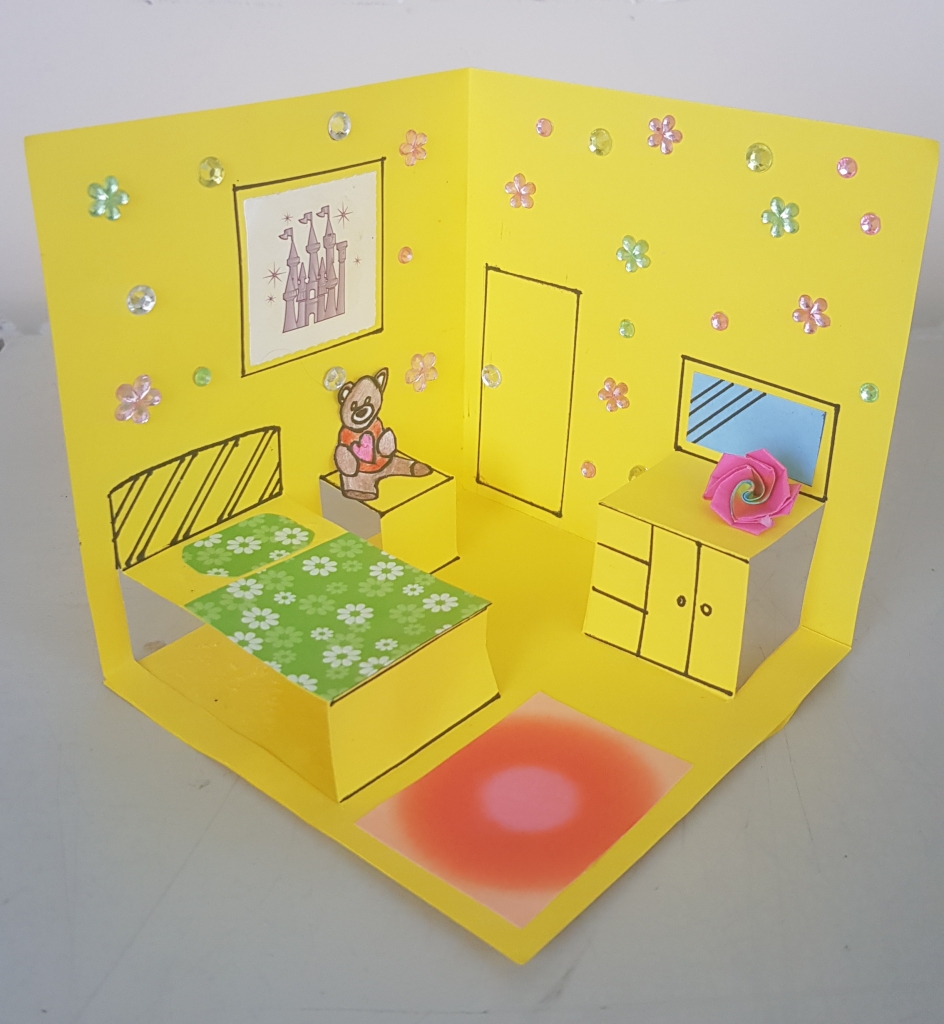
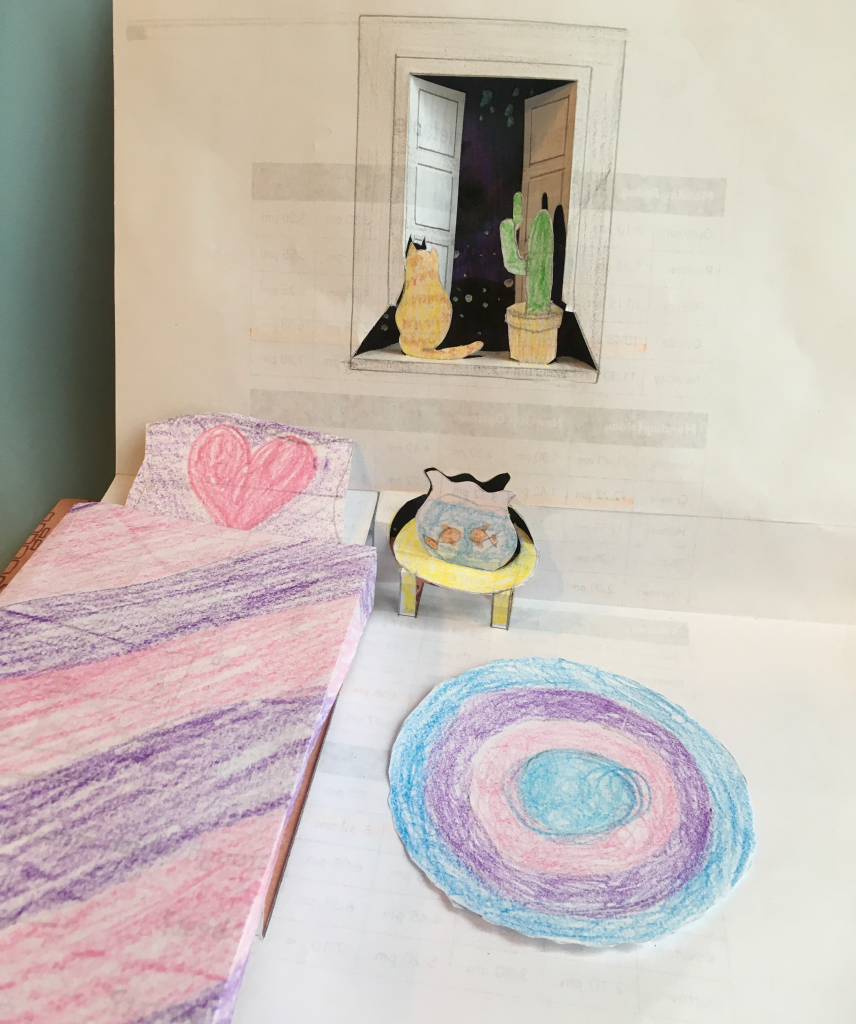
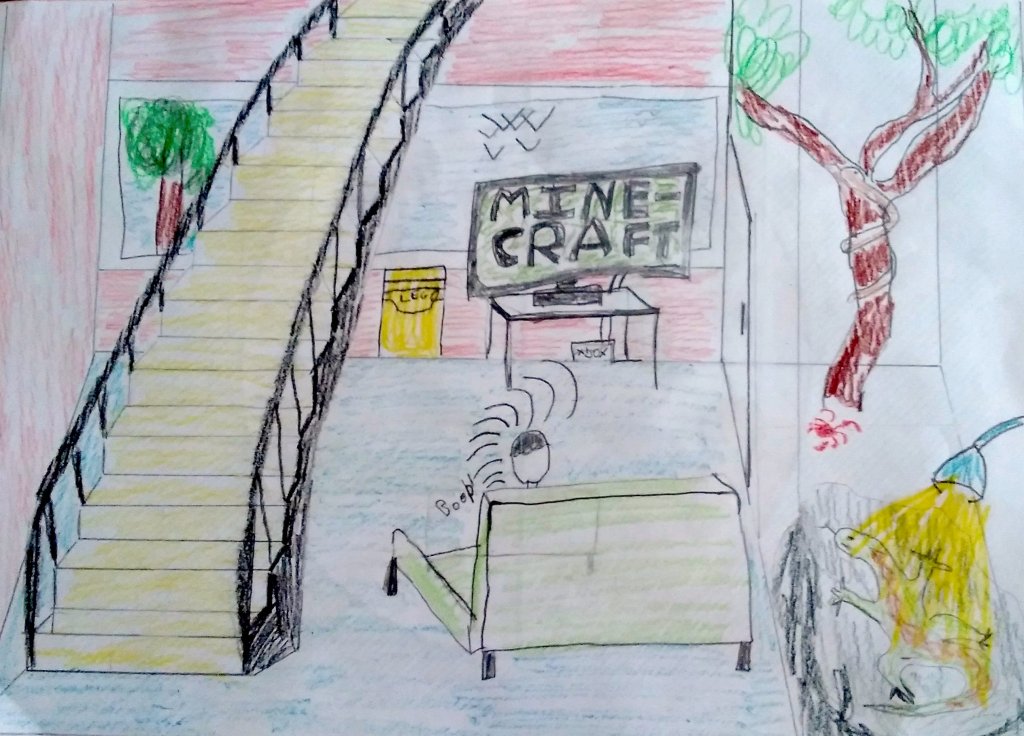
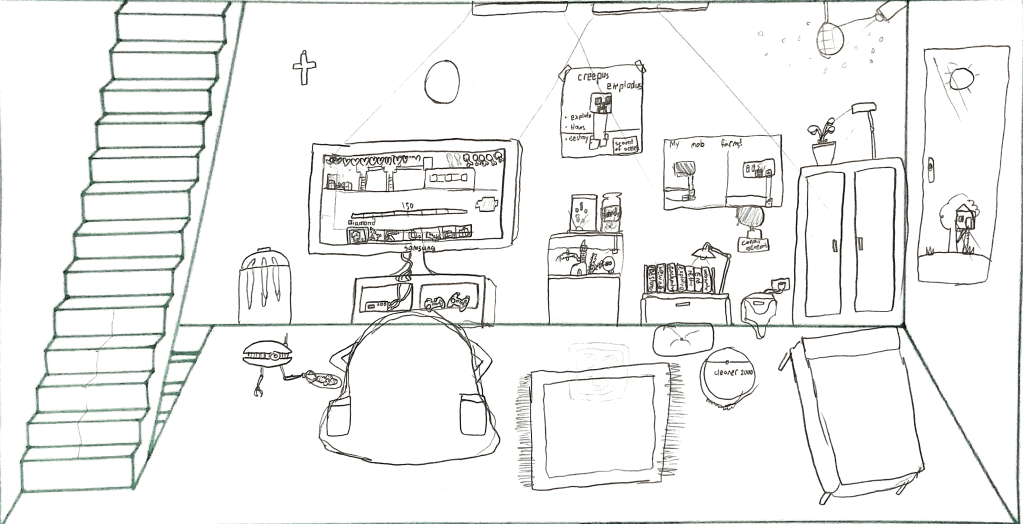
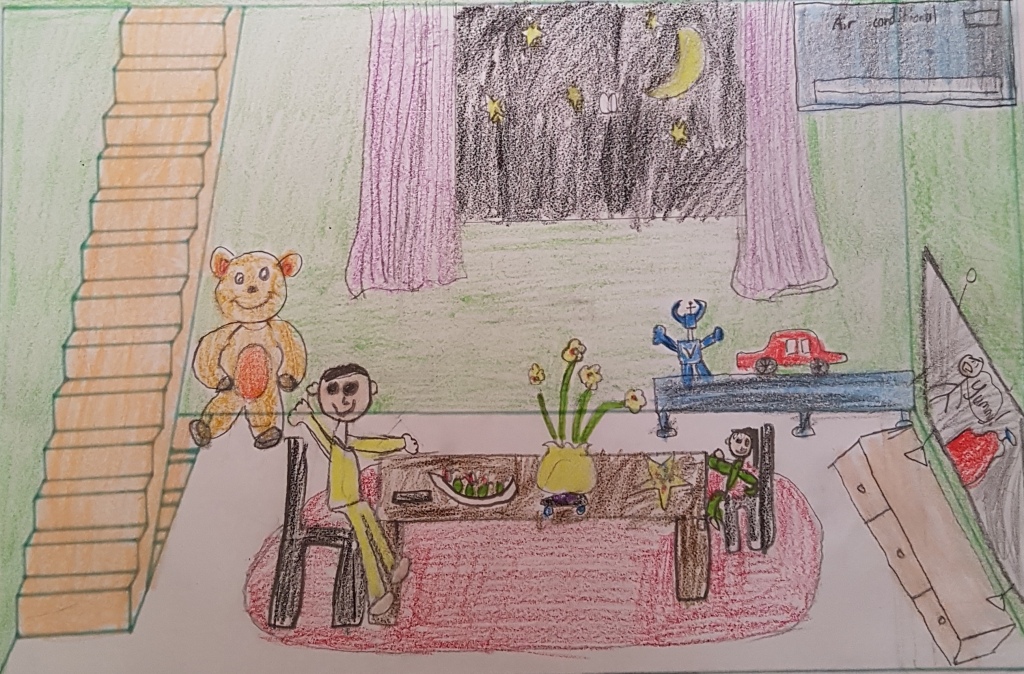
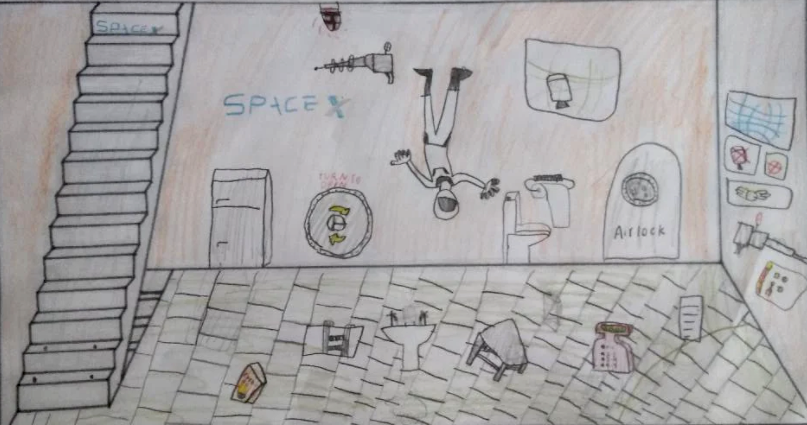
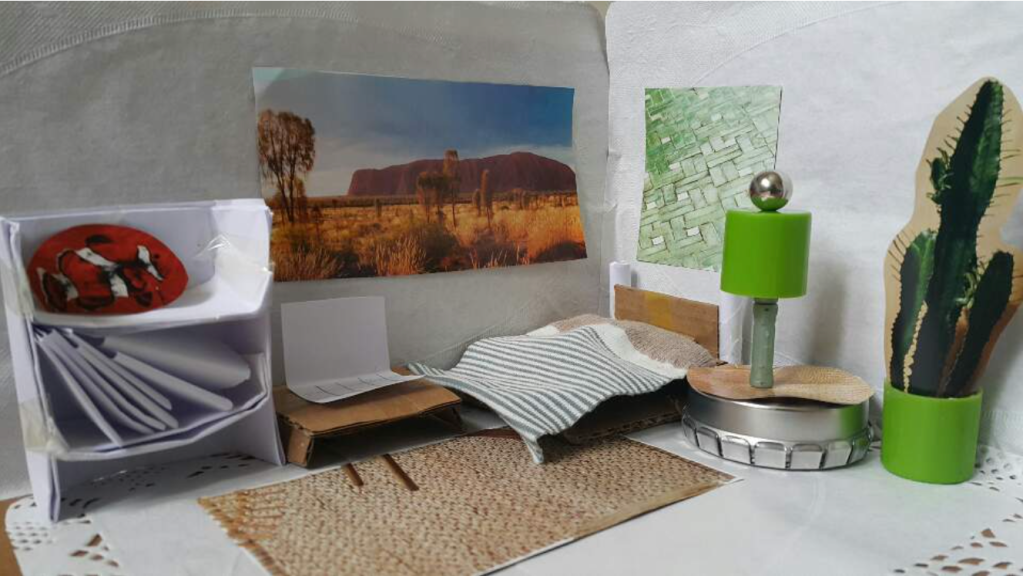
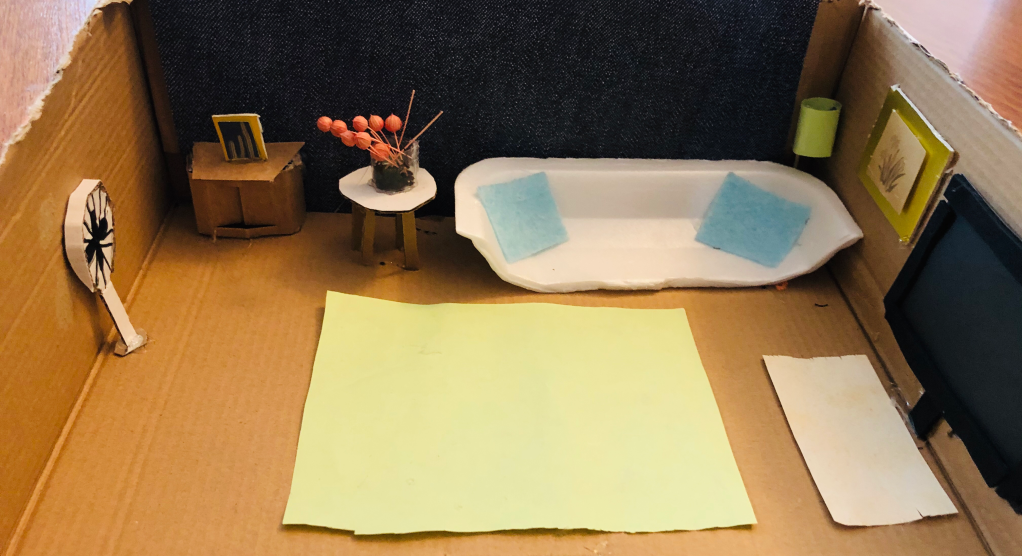
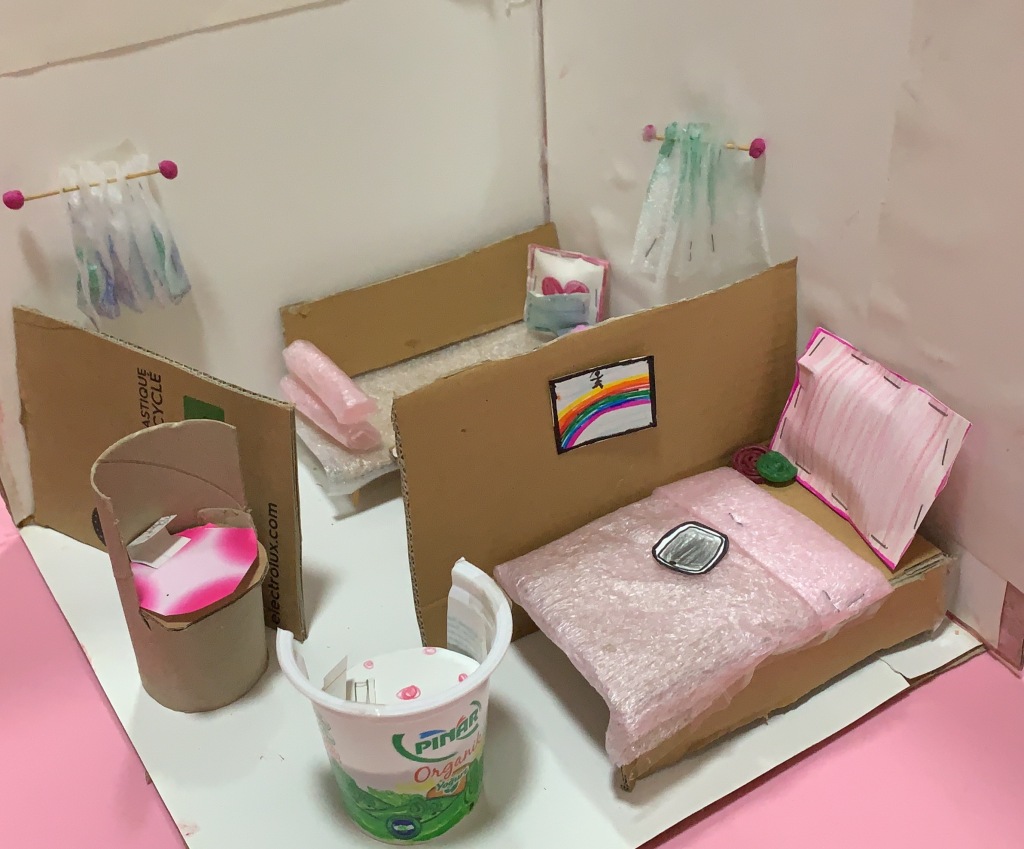
Interior Designer
Pop Up Drawing
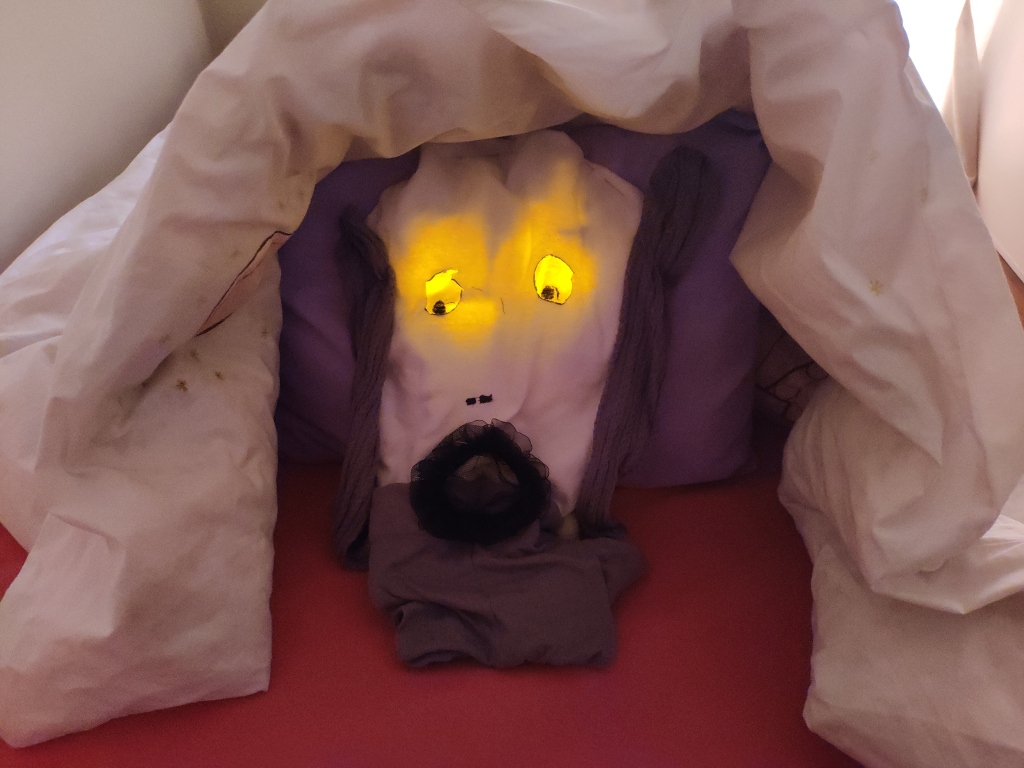
Corona Maison
Miniature Model
For the first week, we explored Interior Design. Students had the choice to 1) create a pop up room design drawing, 2) create a drawing of their ideal quarantine space (part of a worldwide collaborative drawing project) or 3) create a 3D miniature model. You can see further project details here.
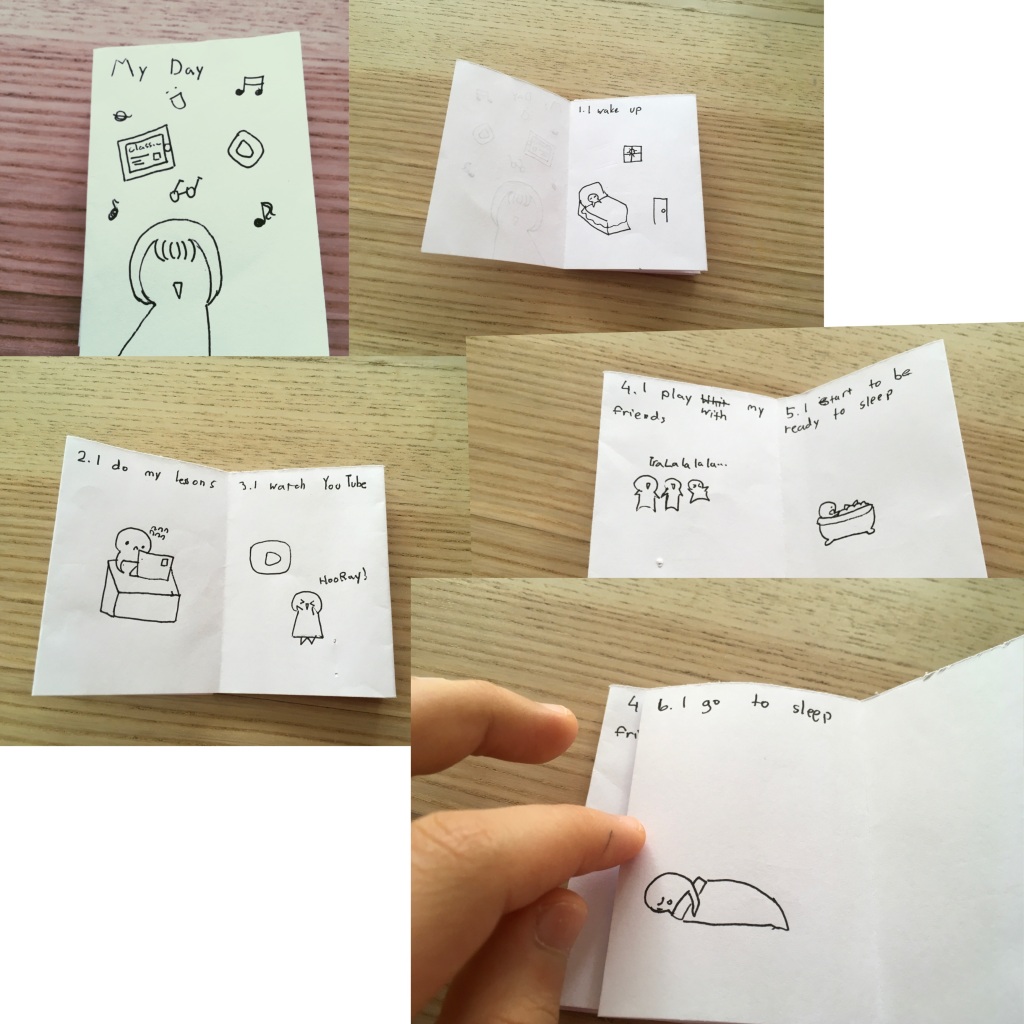
Graphic Designer
Quaranzine
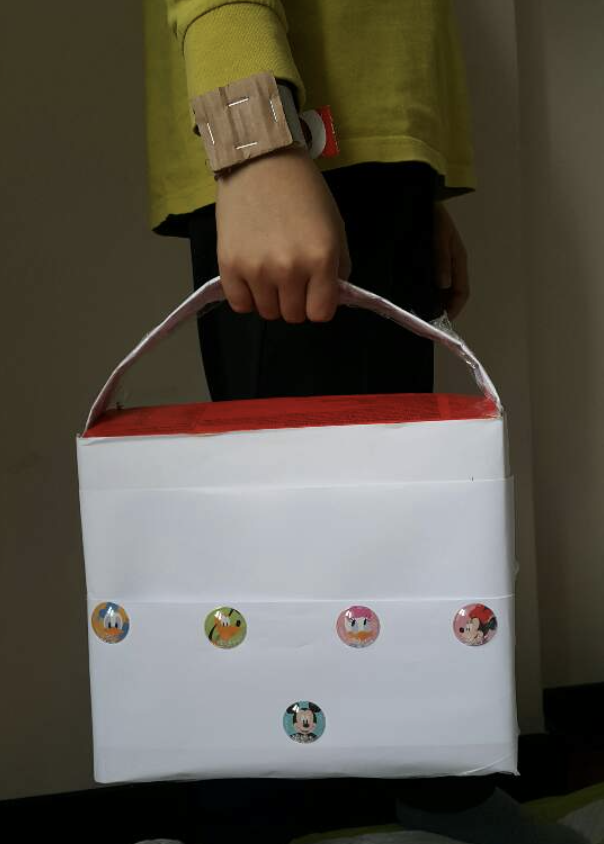
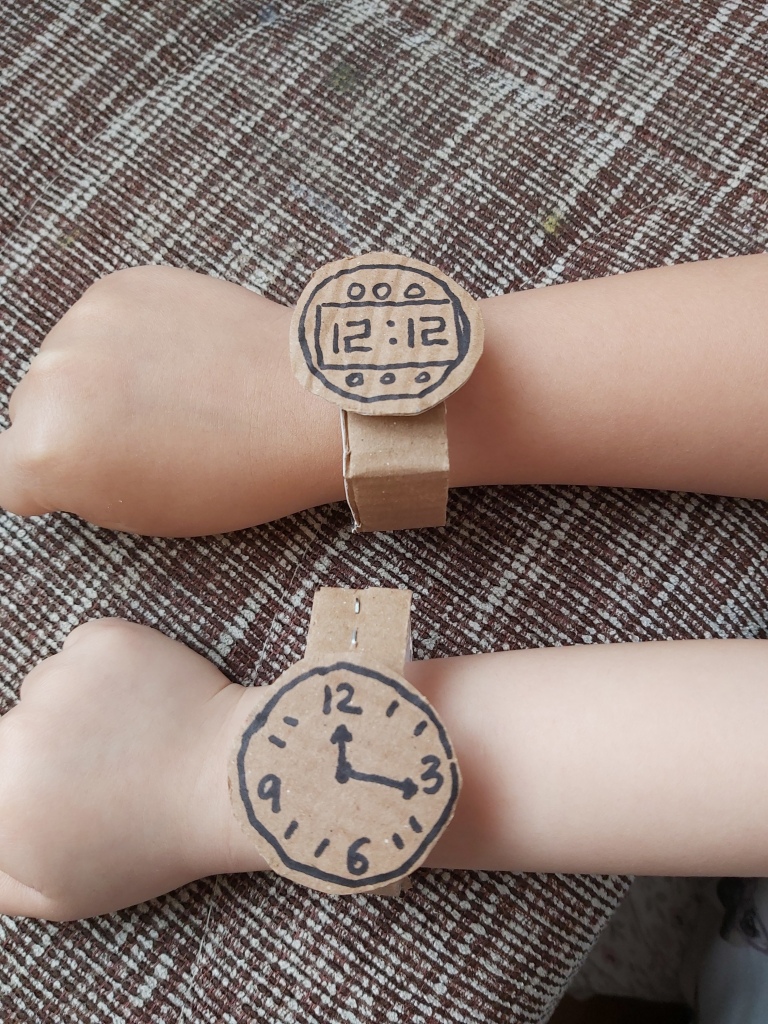
Fashion Designer
Wearable Art
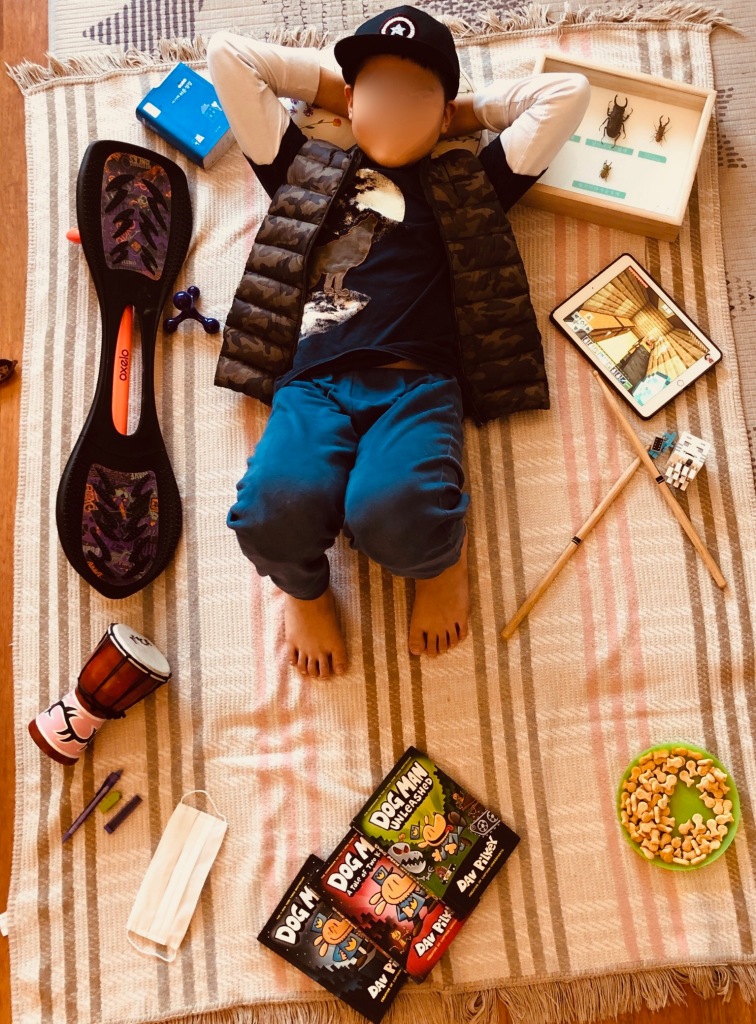
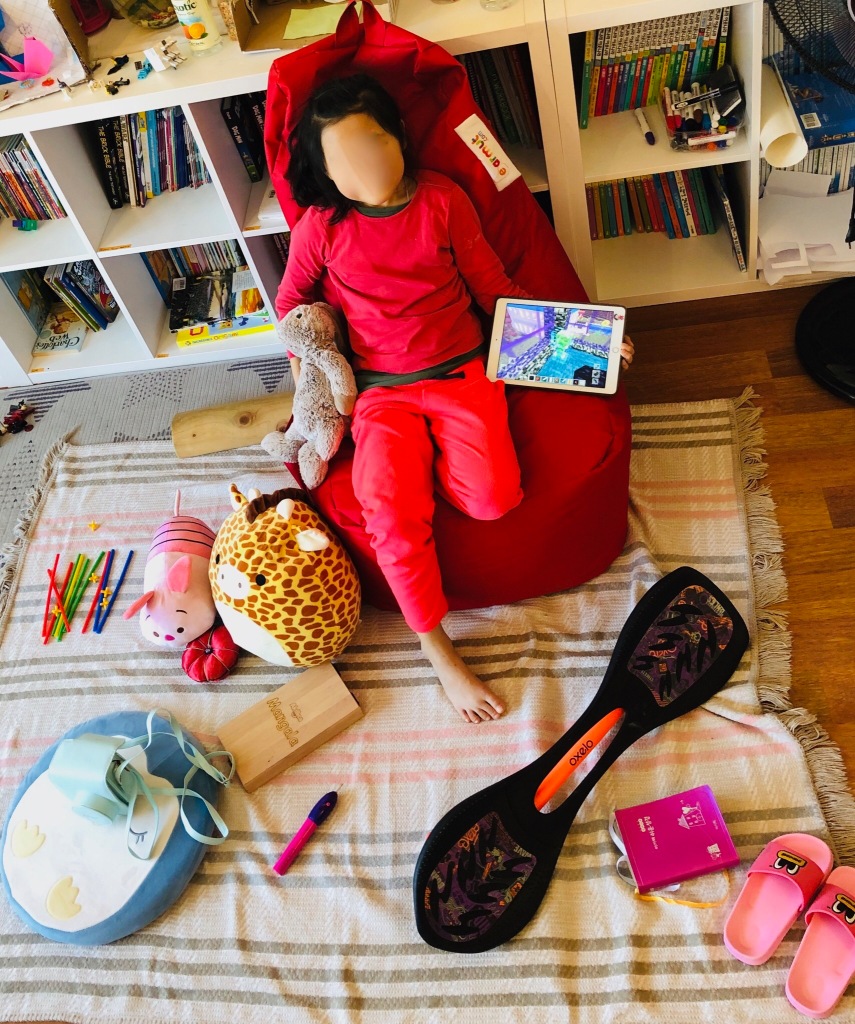
Photographer
Covid Portraits inspired by Gregg Segal
For week two of Careers in Art, students had the choice to take on the role of either a graphic designer, a fashion designer or a photographer. As a graphic designer, the task was to write and illustrate a self published zine, or Quaranzine; including both images and text in a handmade book made from one sheet of paper. To explore fashion design, students were challenged to create a piece of wearable art. This could be an accessory, such as a bag or watch, or an entire outfit. The only limitation was that it should be made from recycled materials such as paper or cardboard. To explore photography, we took inspiration from photographer Gregg Segal and his portrait series called Daily Bread. The task was to first collect items that have been important to students during quarantine and at home learning, to arrange these items around themselves and have their photograph taken. See further project details here.
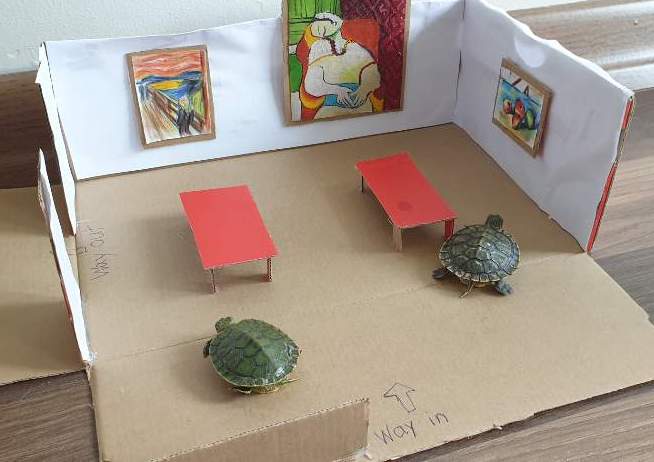
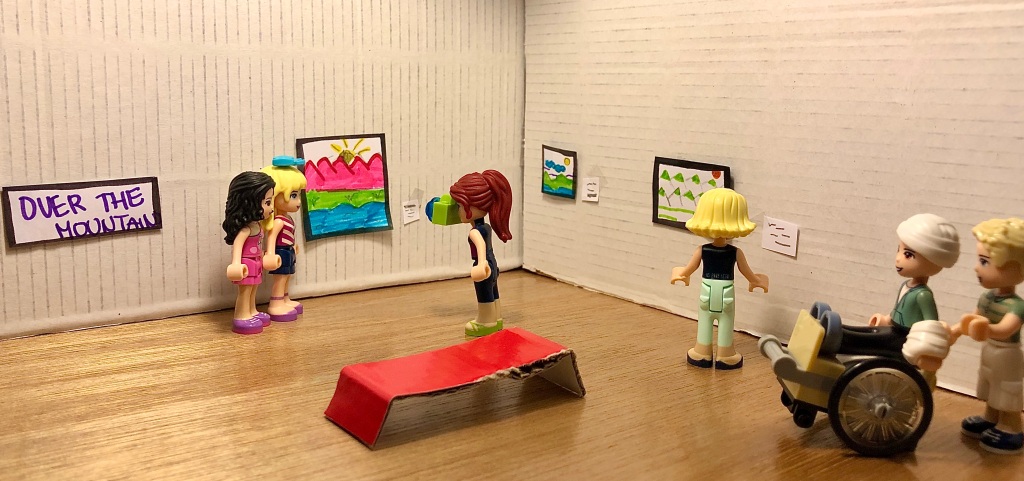
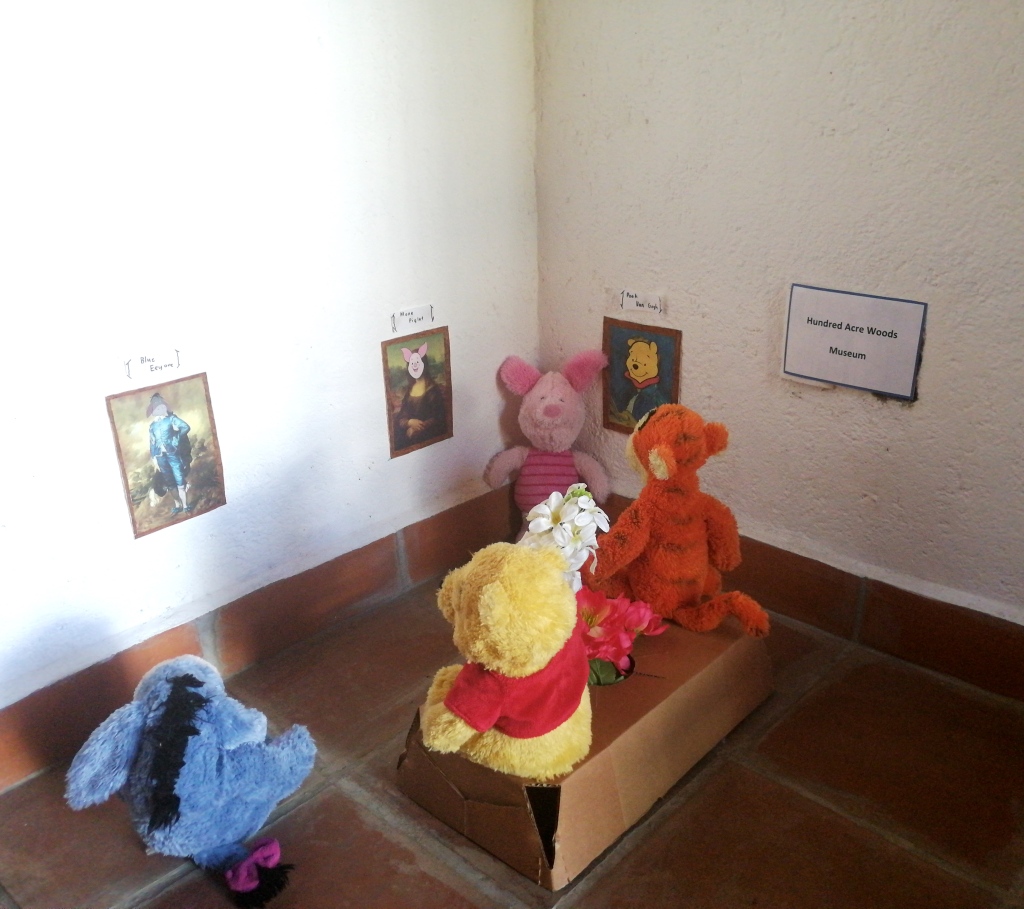
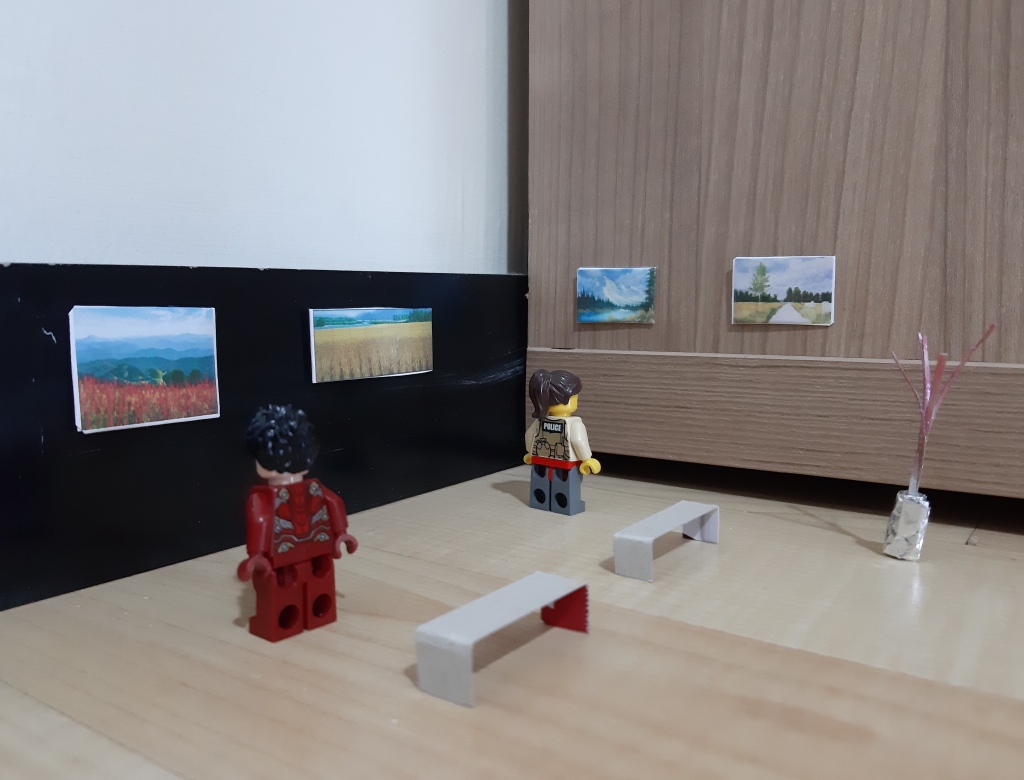
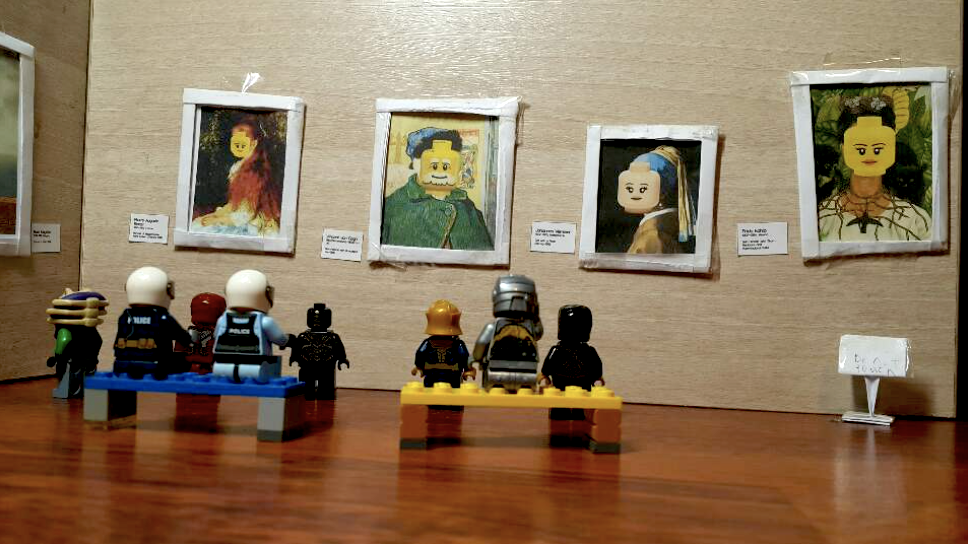
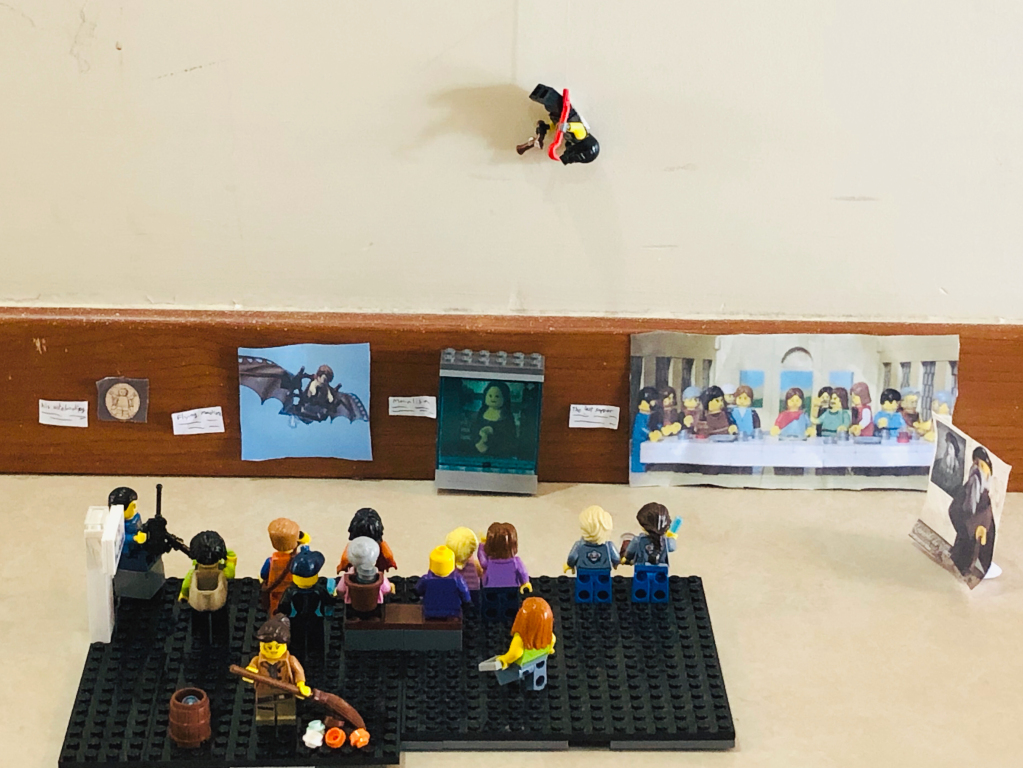
Curator
The final project was first to create a collection of miniature artworks that showed unity, and secondly, to organize and present this collection for display to an audience. The details for this project can be found here.
I am so proud of all of the work my students achieved during at home learning! I learned new ways to incorporate technology into my art curriculum and my students stayed engaged and participatory throughout each new weekly challenge, learning many new techniques and processes. I really enjoyed seeing the work they turned in each week, though I missed watching the creative process at work in the classroom.
Here’s to the end of the year, and the end of a season. A job well done, for everyone!
We managed to do TWO sculpture projects this semester! I am so glad that my students can have the experience of 3D creating, even with my limited knowledge- we learn together and they always LOVE it!
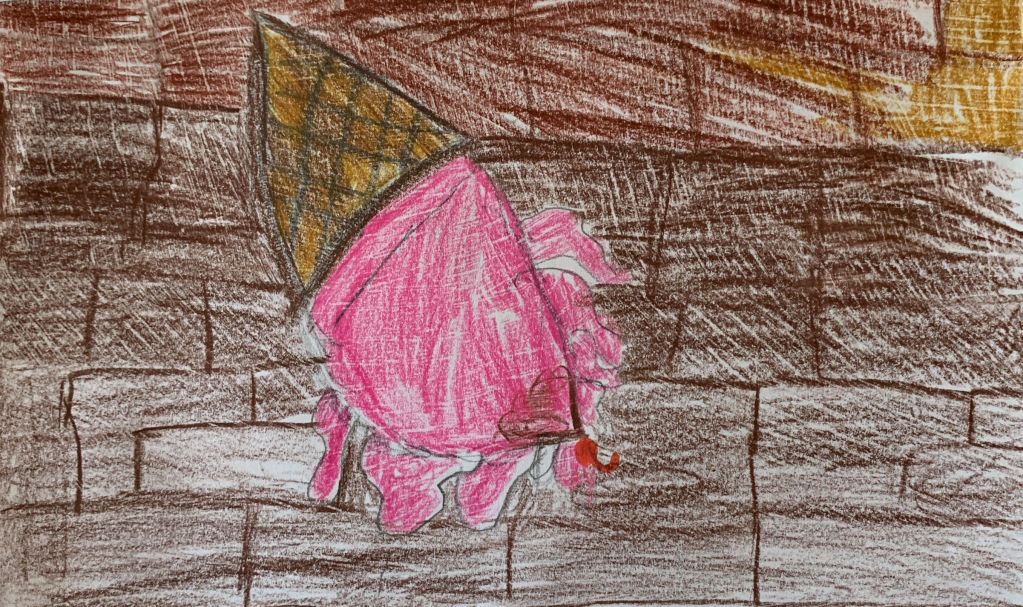
Just before we moved to online learning for the remainder of the year, my students had finished (but yet to be painted) pop art clay sculptures- here is the same project from a few years ago.
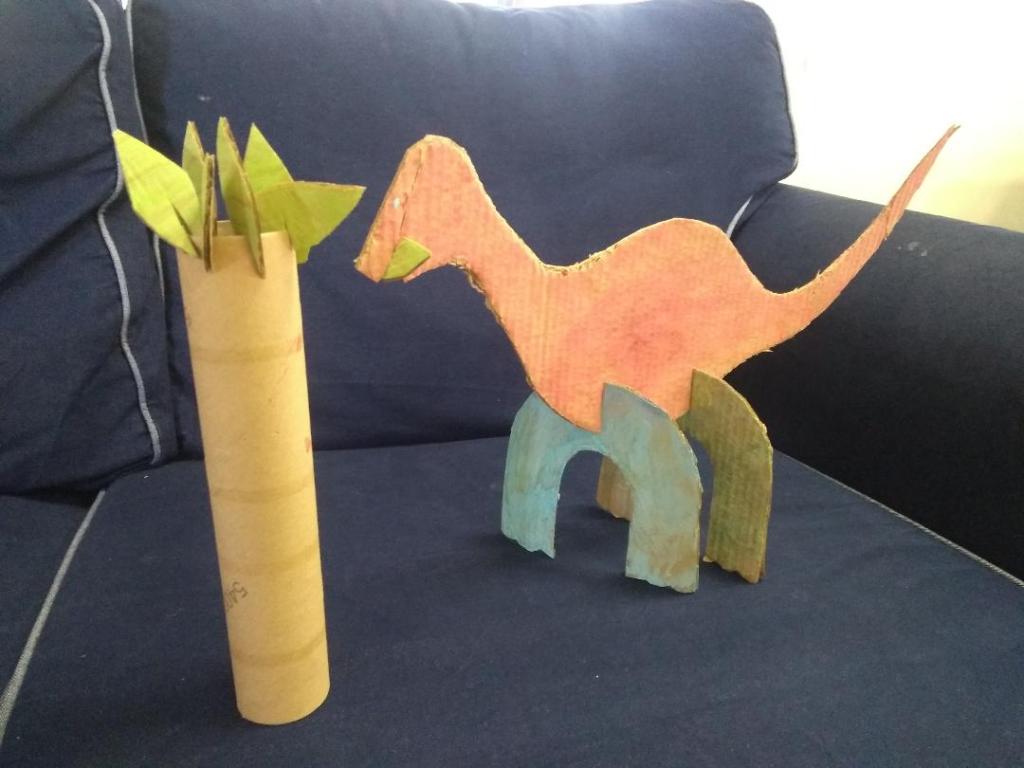
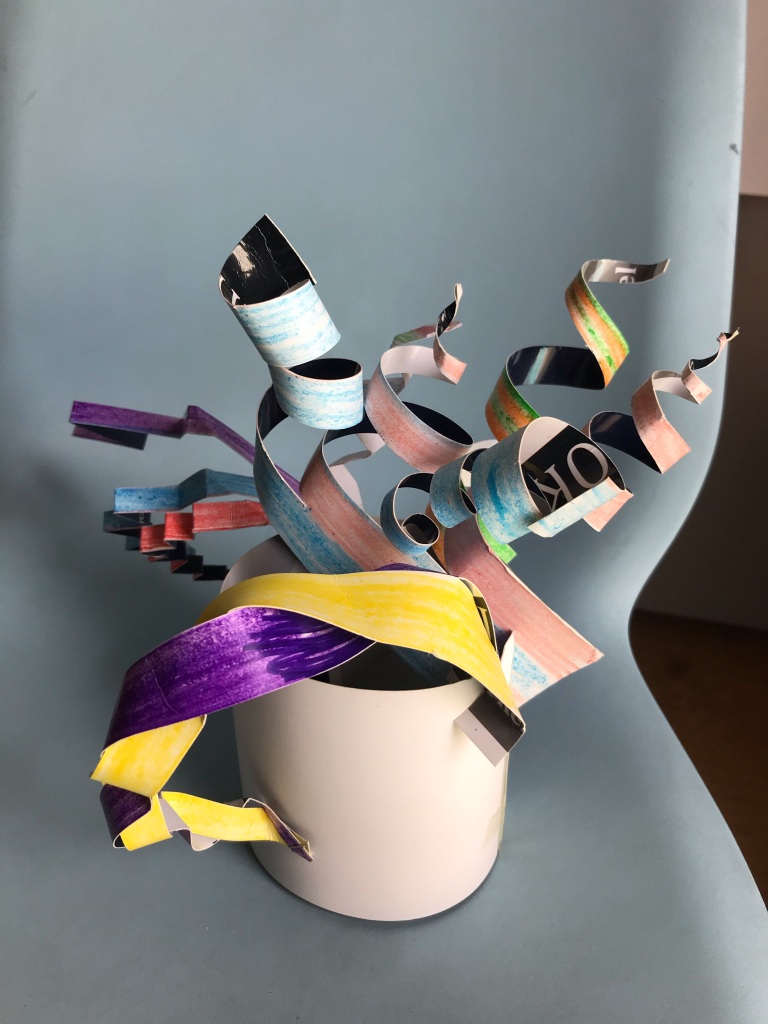
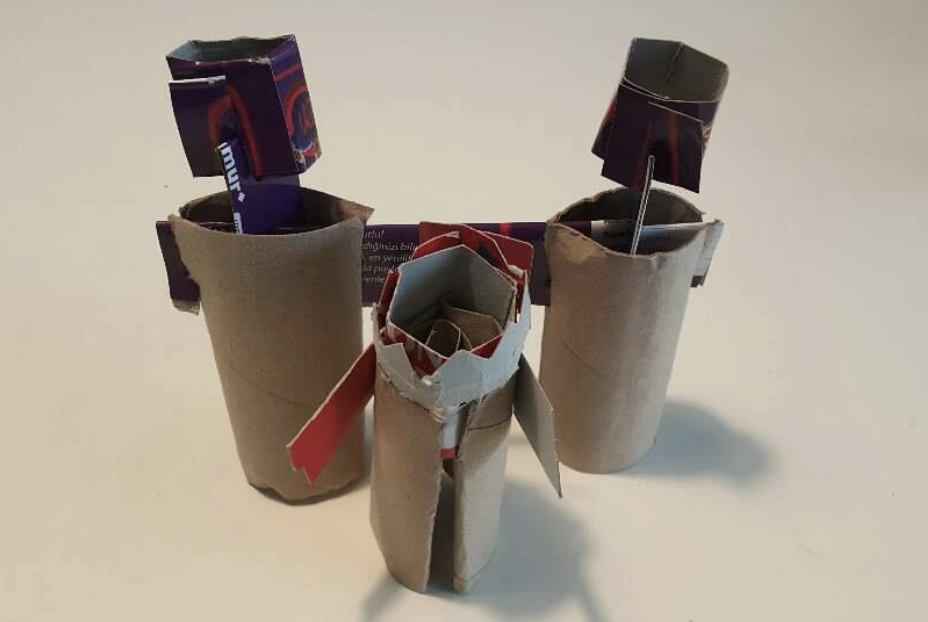
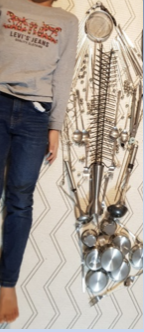
As part of our art processes exploration, I decided to give them an abstract sculpture challenge using recycled materials. Like always, they had the choice based on whatever they had around the house, and I included several artists for inspiration. See the project details here.
Cardboard • Alexander Calder
Cardboard was by far the most popular choice, likely because it is the easiest material to work with! As you can see, we had a variety of different results, from abstract to more representational.
Plastic • Dale Chihuly
Plastic is a difficult material to work with- I have always wanted to try a Chihuly inspired project but it felt to craft-like for my classroom. I was excited to see a few students attempt it, despite my pitiful results in the demo video. I would like one day to try a version of this using Shrinky Dinks!
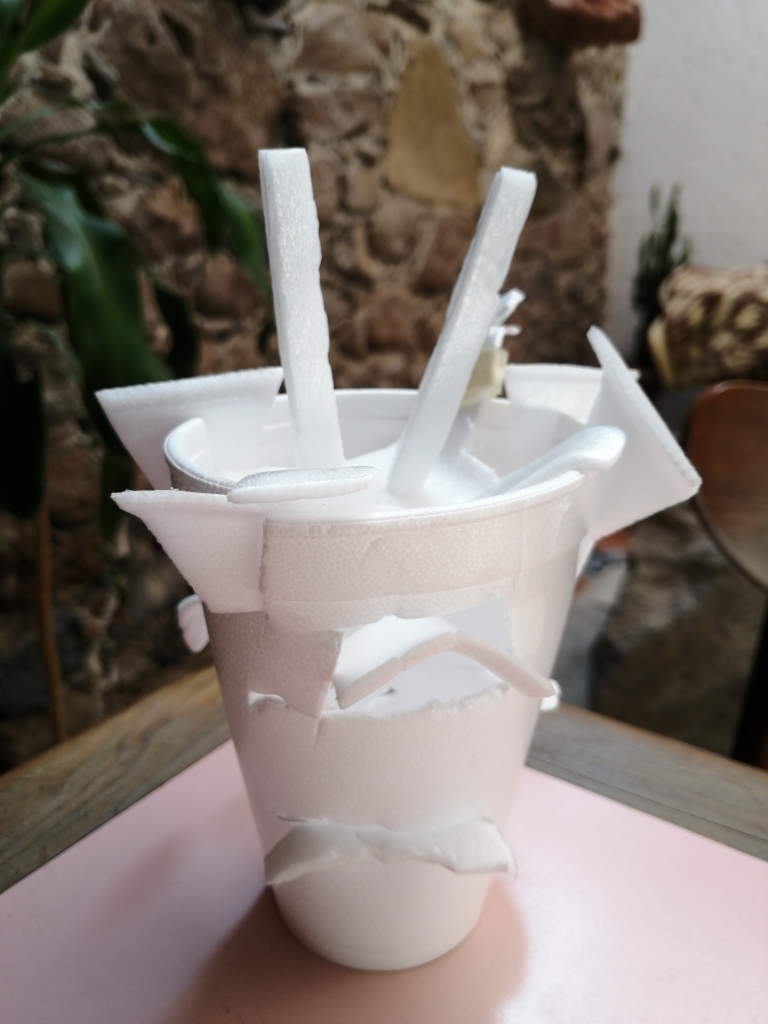
Styrofoam • Jules Vitali
Styrofoam is also tricky to work with (I am having flashbacks to yet another undergrad sculpture project!) There are many artists who have found inspiration in the form of styrofoam cups, either drawing on them or, like Jules Vitali, creating intricate 3D works cut from one piece. I am proud of this one student’s effort in trying it!
I have a special place in my heart for typography; remembering back to my first design class in university, and having my eyes opened up to the intricacies of lettering. Once you start noticing typefaces and details of letterforms, you can never go back! I wanted to introduce my students to these visual components of lettering, and again I gave them three choices for exploration, you can find the project details here
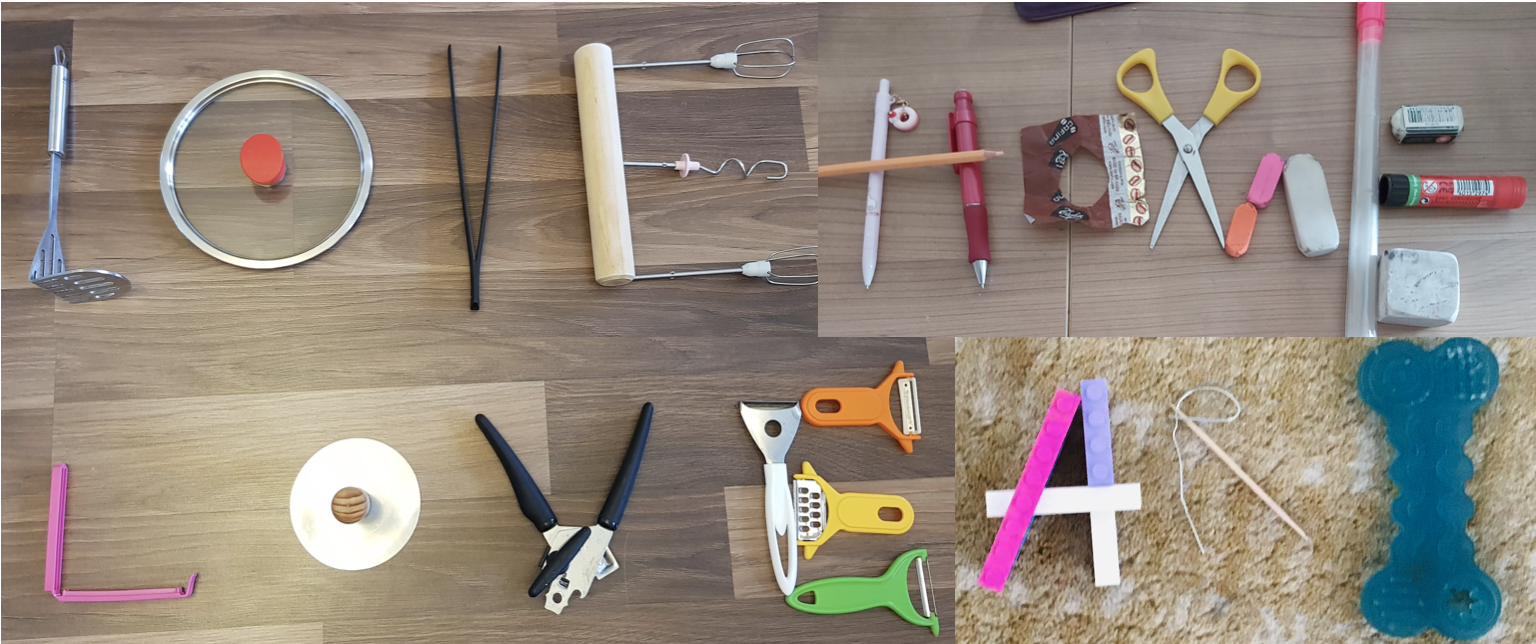
Type Frottage
The first choice was to create a frottage of different words and lettering students could find on objects around the house. In making my example, I discovered there are SO many different examples of type on the items we use everyday! I love introducing my classes to the word frottage because it sounds so much more sophisticated than the crayon texture rubbings we do in kindergarten!
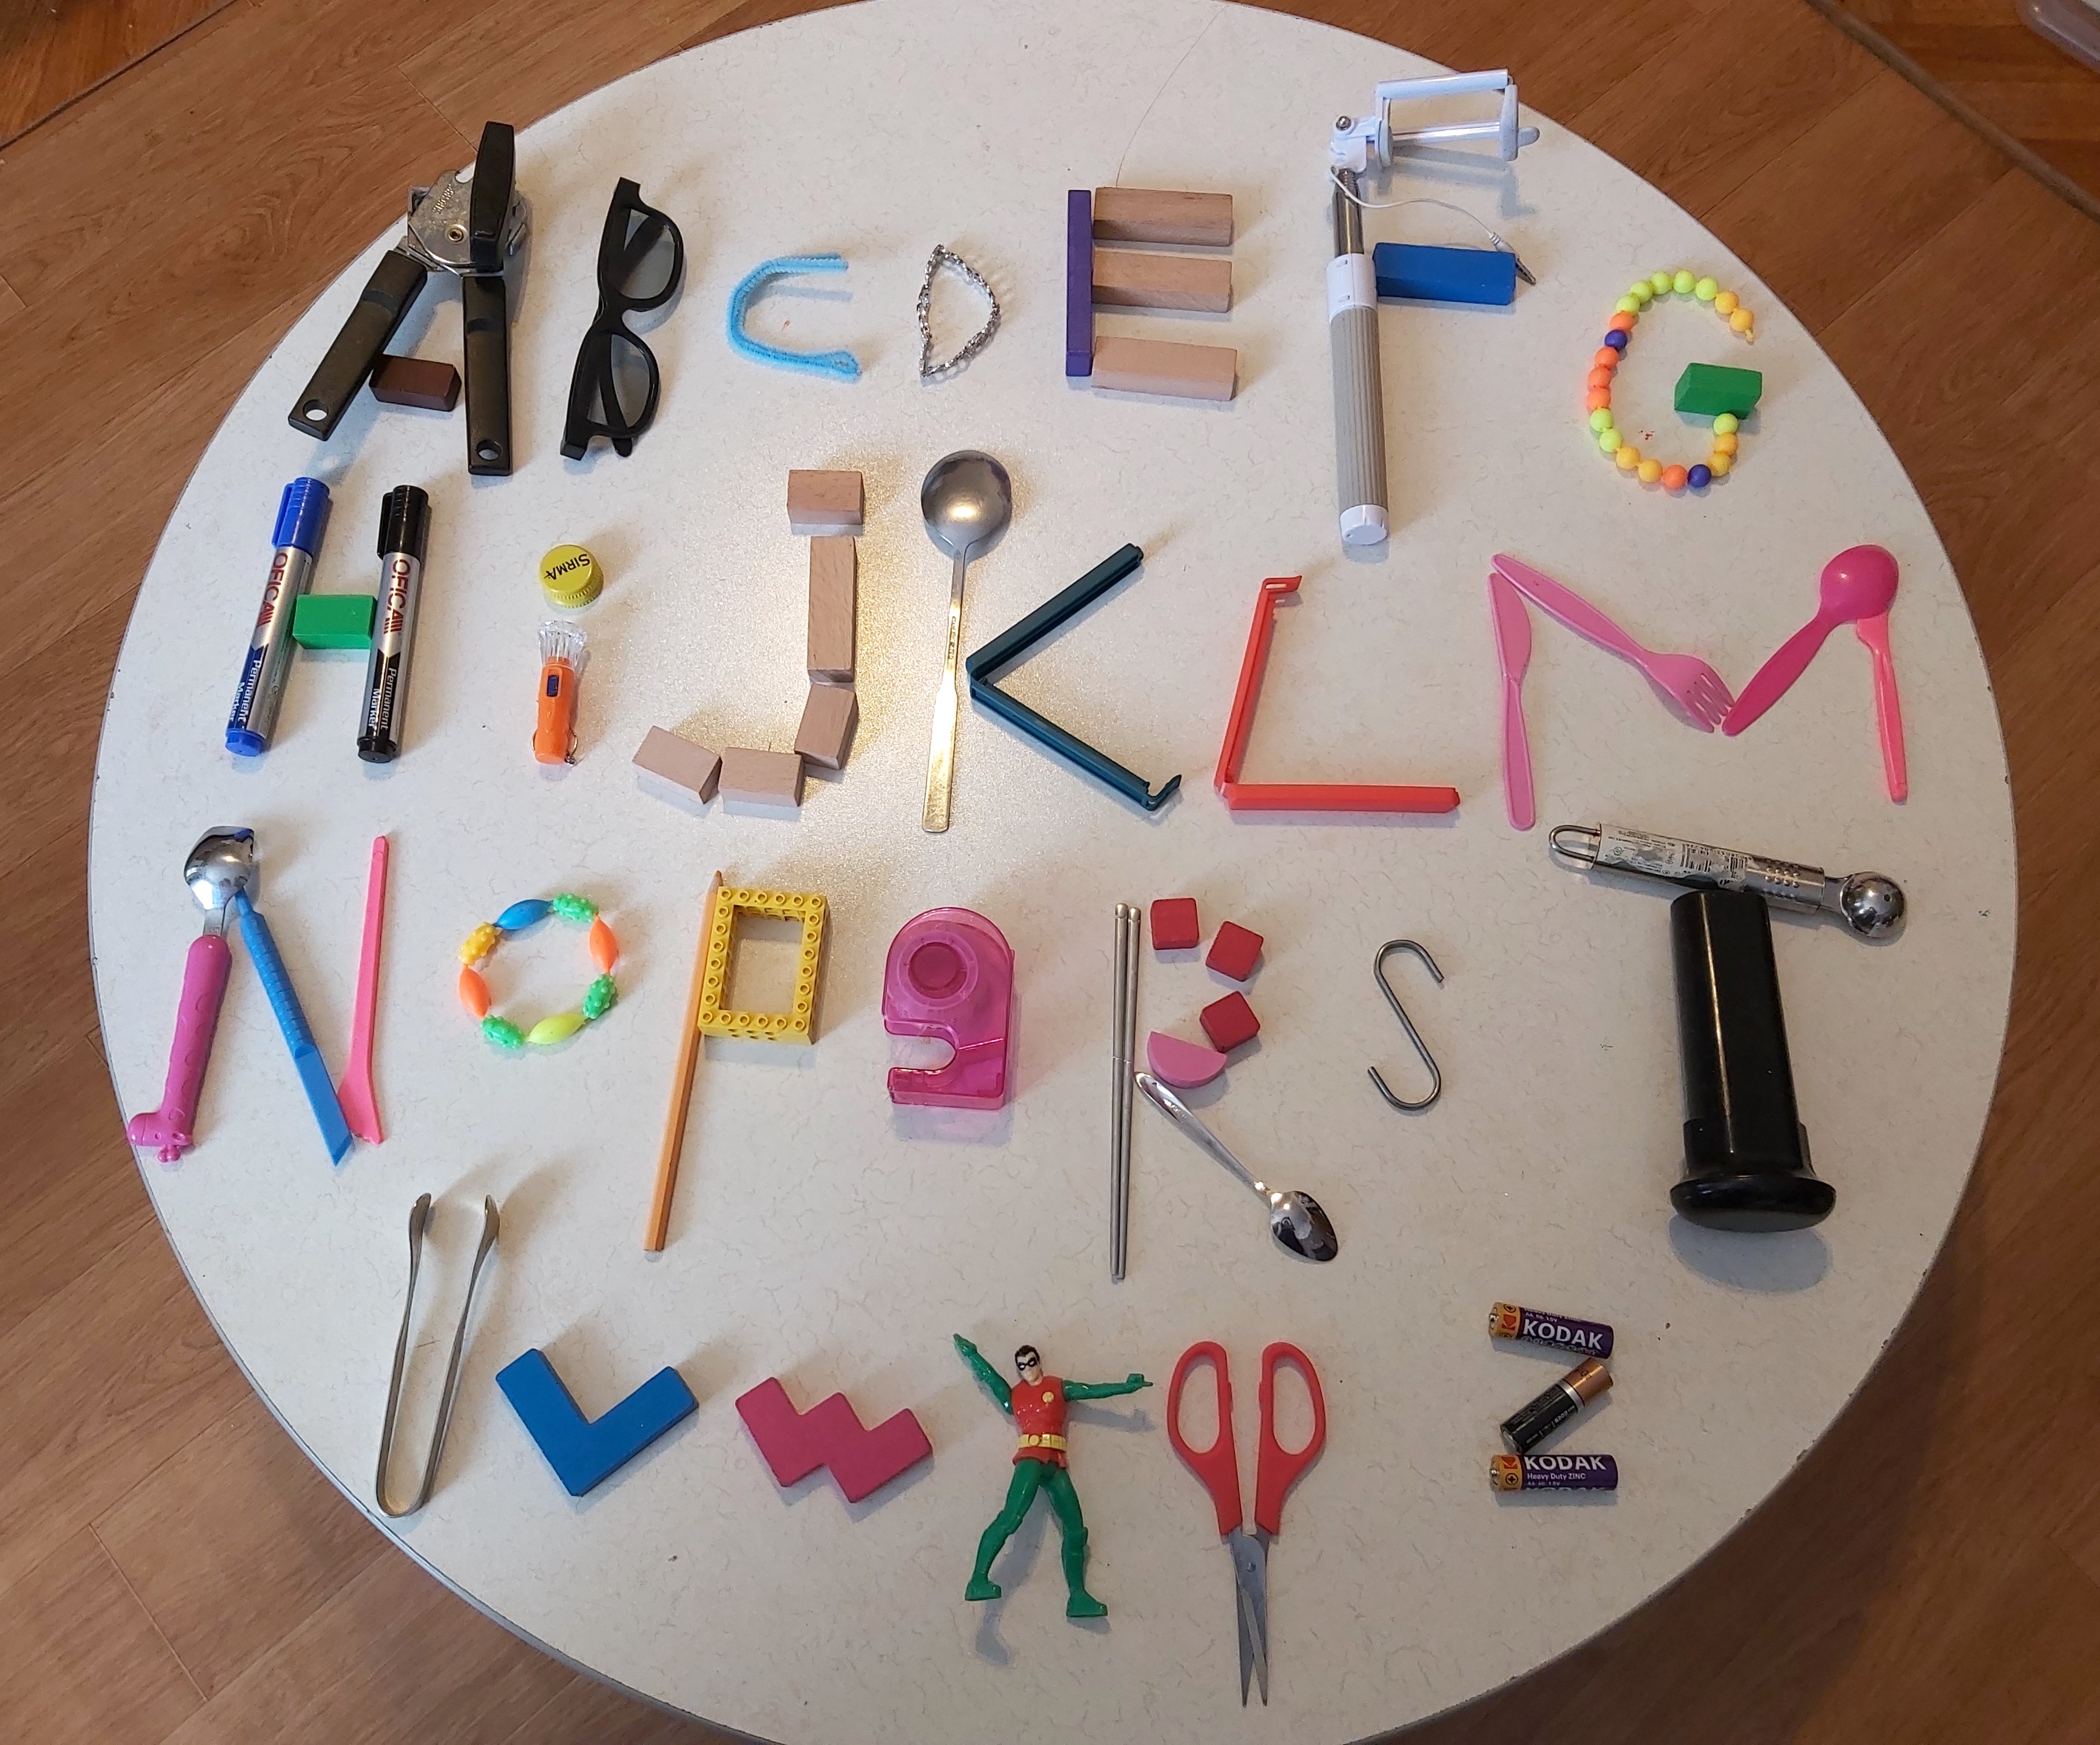
Created or Found Lettering
For this option, I was inspired by a favourite project of mine from university days where we took photographs of found type in the world. I have seen many other art teachers also trying this with students while they are learning at home! I had my students choose an entire word to spell out with different objects they could find around their house, though I did have one student make the whole alphabet!
Illustrated Type
This option is dedicated to all of my creative thinkers and those who love to draw! Students had to choose a word to illustrate, combining the letters of the word with the shape of the object. I found steps that broke down the task into more manageable steps, though it was still a bit tricky for the students that chose to do it.
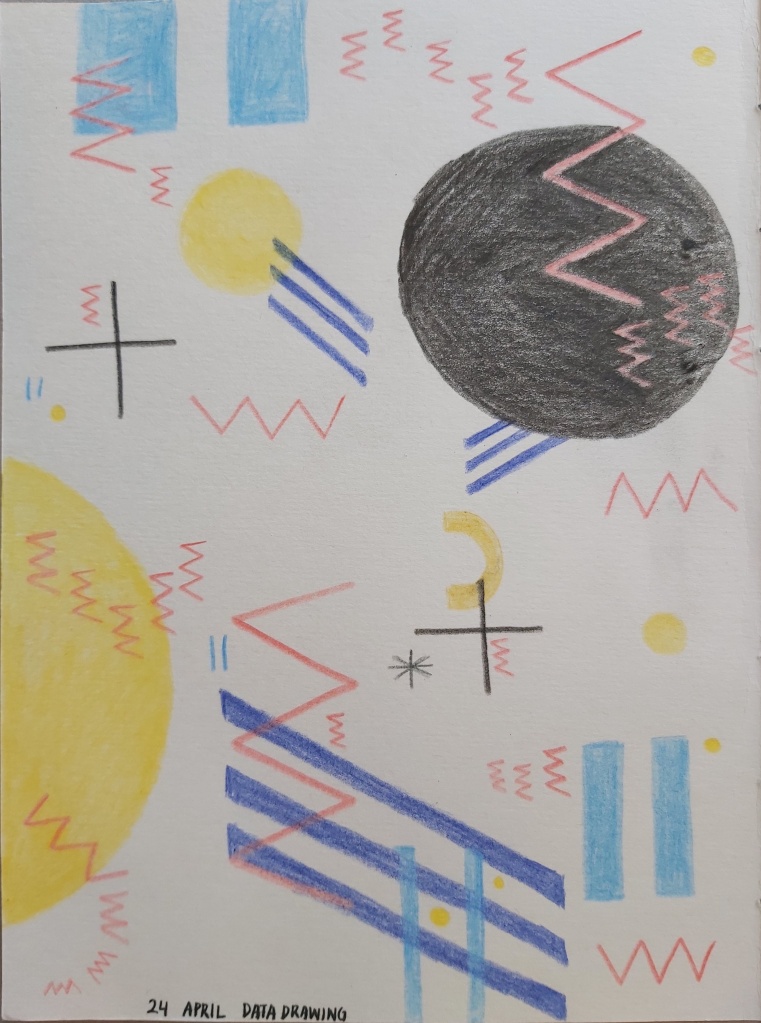
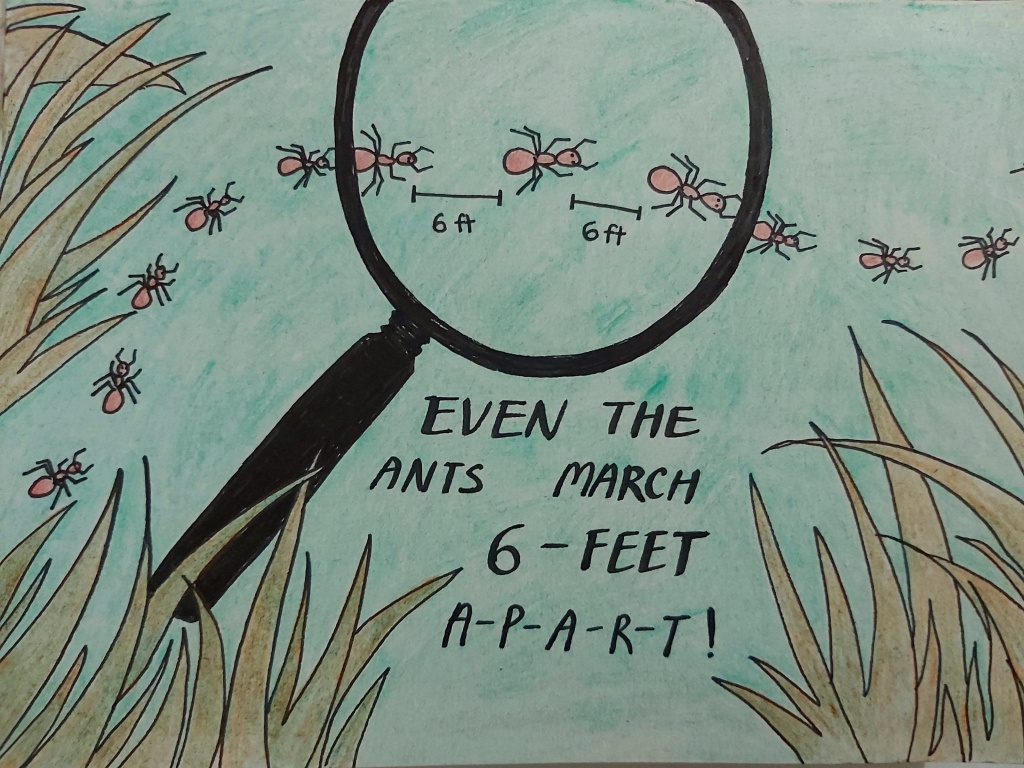
Last week’s theme was drawing. Again, I gave students three choices of projects to choose from (you can see the powerpoint with instructions here) It seemed like the students really enjoyed drawing through a more playful process, and I received a LOT more entries than have been typical in these past few weeks. Here are a few of my favourites. You can see the others on our new Artsonia page.
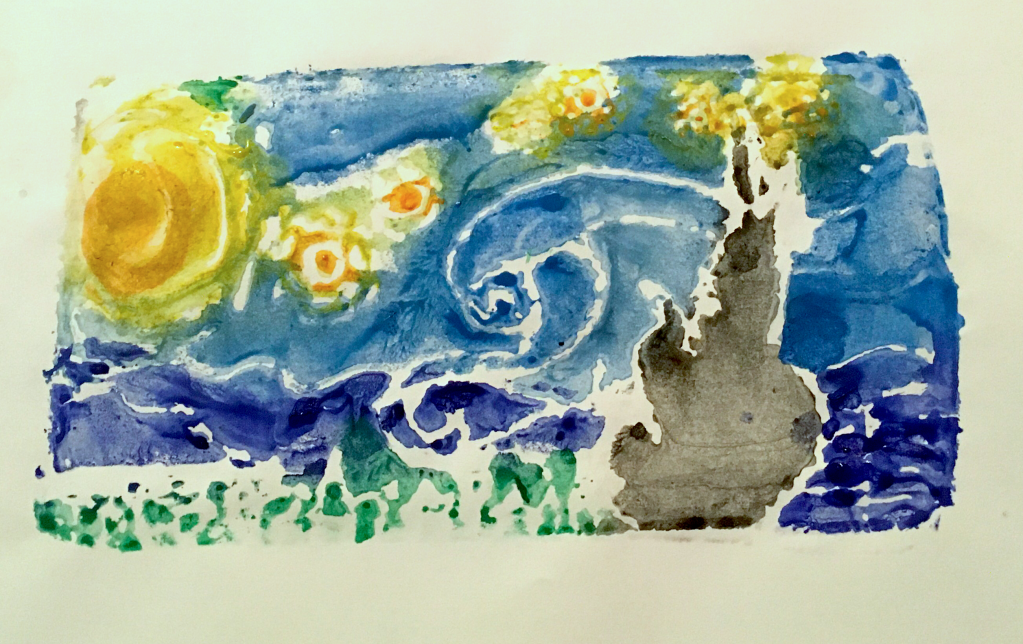
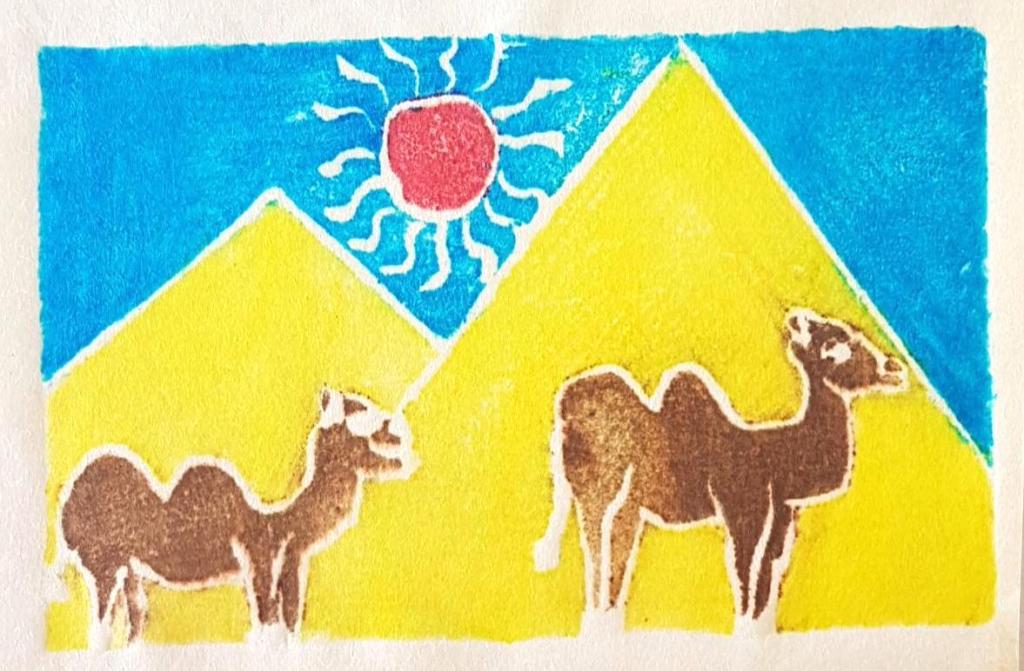
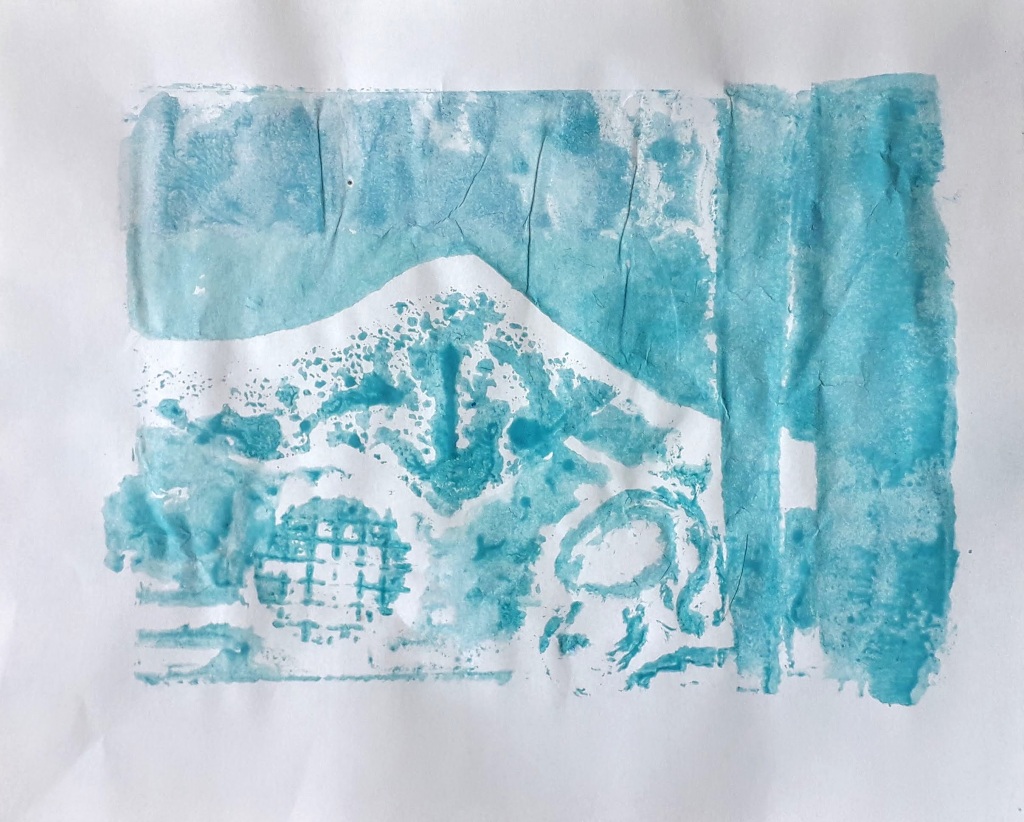
I look forward to teaching printmaking every year and seeing the students’ eyes light up at the magical process. I was planning to make spring landscape collographs with them like these second and third grade ones from a few years ago… instead I dove into experimental mode and made three separate video tutorials for printmaking with various alternative material options. It was time intensive, but worth it as students began sending me photos of their finished prints! If you are curious about printmaking, you can see the project here and samples of their work below.
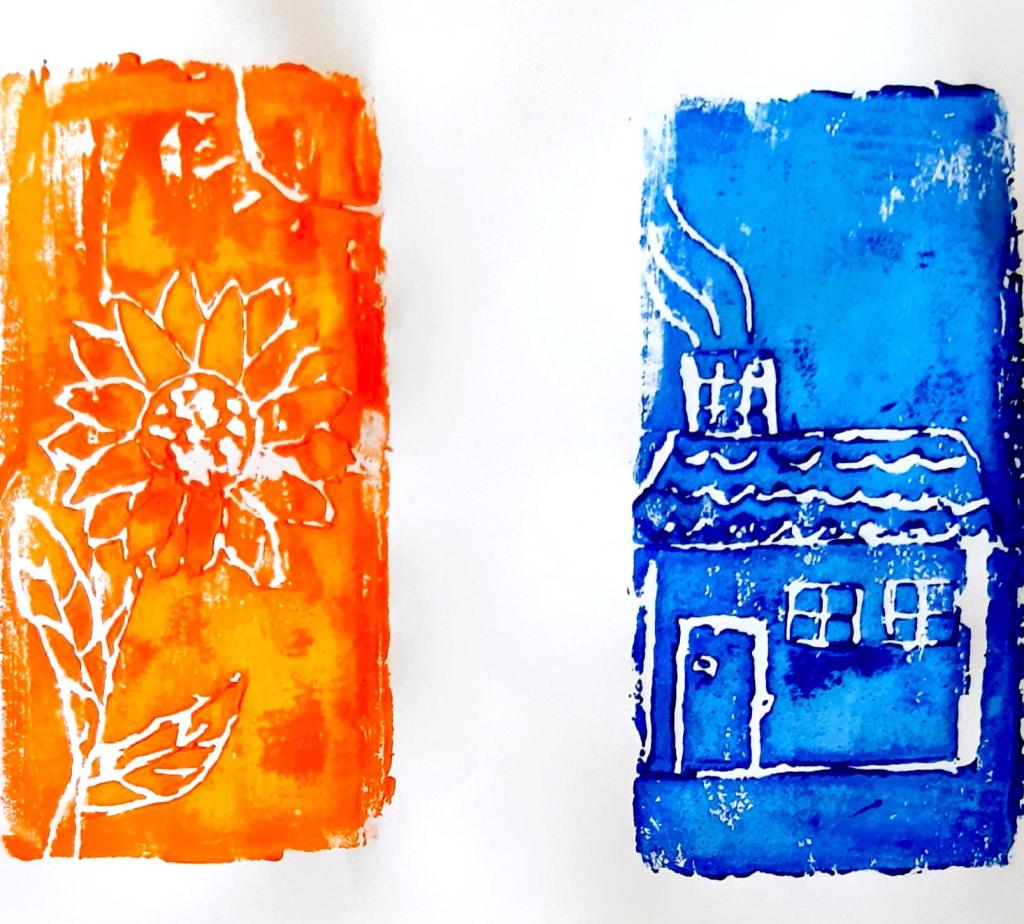
Monoprint
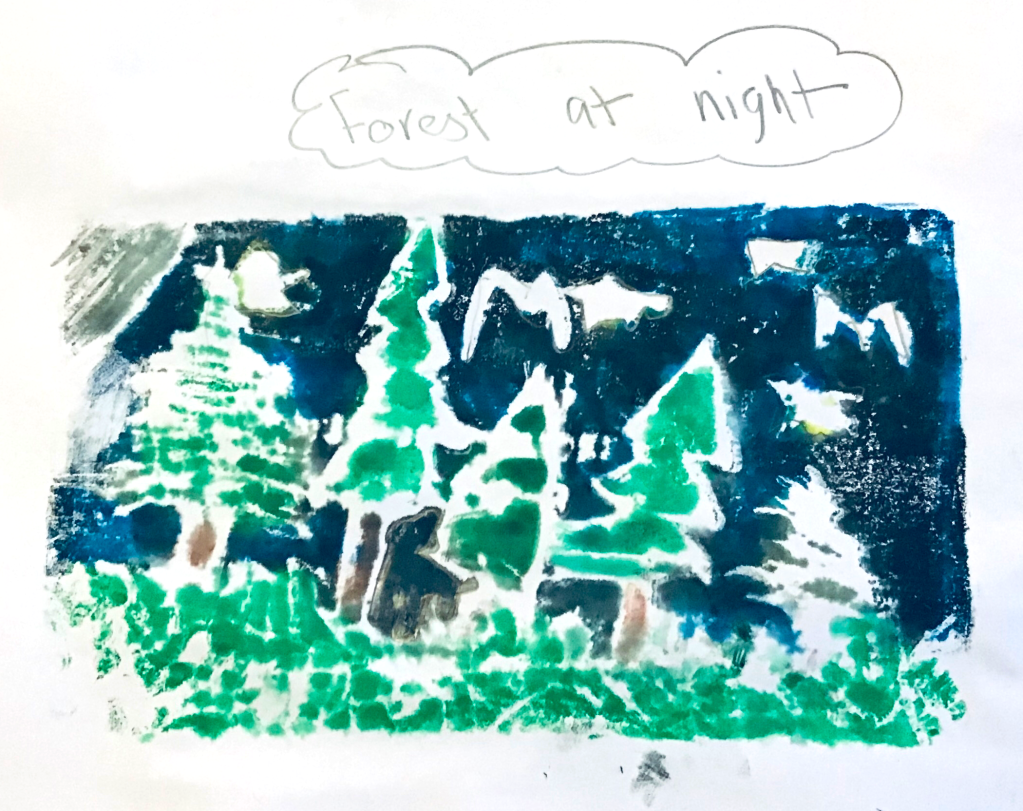
Styrofoam Relief Print
This method was the popular choice! Can you spot the one inspired by a famous painting?
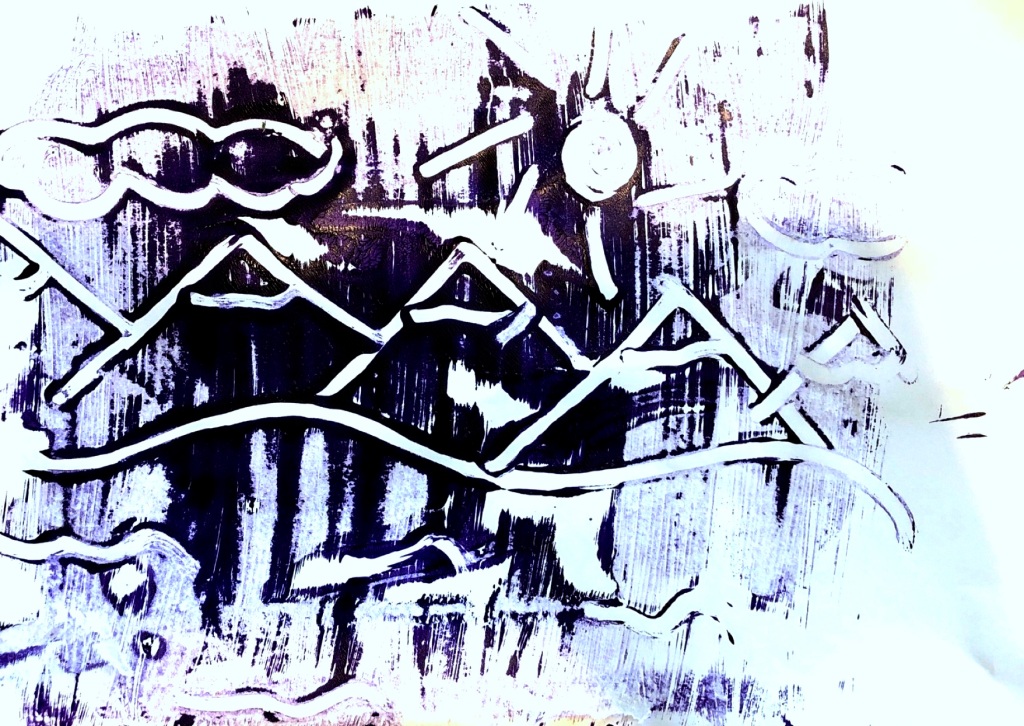
Collograph Print
No one chose this, despite it being the method I wanted to teach. I love the results, although coincidentally, this was the method I disliked the most in art school!
As we move into a new normal of teaching remotely, I have been inspired by all of the resources out there and the many art teachers sharing their great lesson ideas! In planning projects, I want to account for kids with little to no resources at home, and think of what they could use to make art, perhaps in a different way than we do in the classroom. With so many creative ideas circulating, I decided each week to give students three choices in how they could create, with differing levels of difficulty, thought and creativity involved. I had so much fun creating my example, I thought they would too!
I was surprised at the number of responses and how many of my students turned in work. I was also happy to receive at least one student example for each of the prompts I provided.
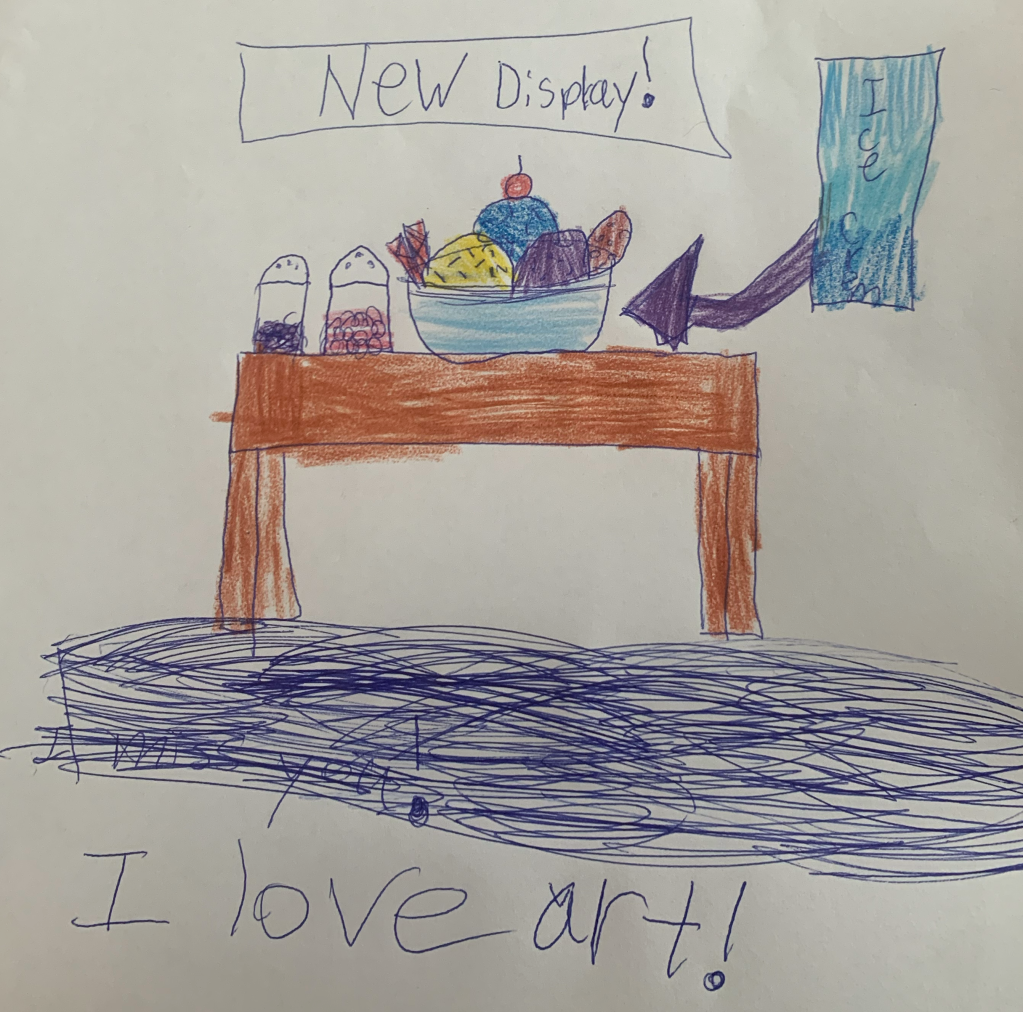
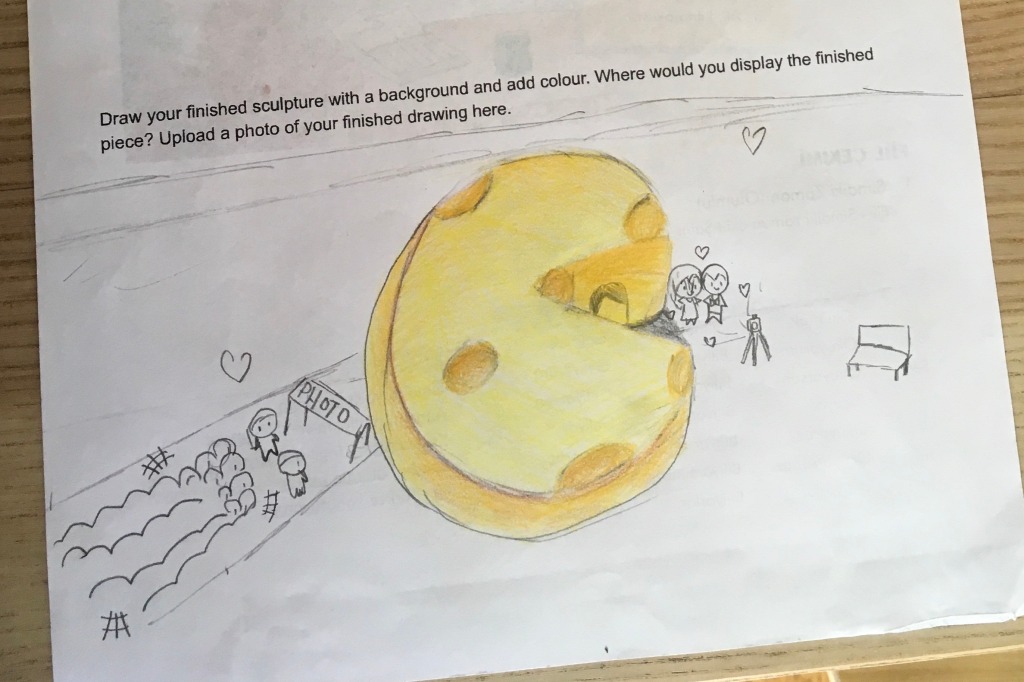
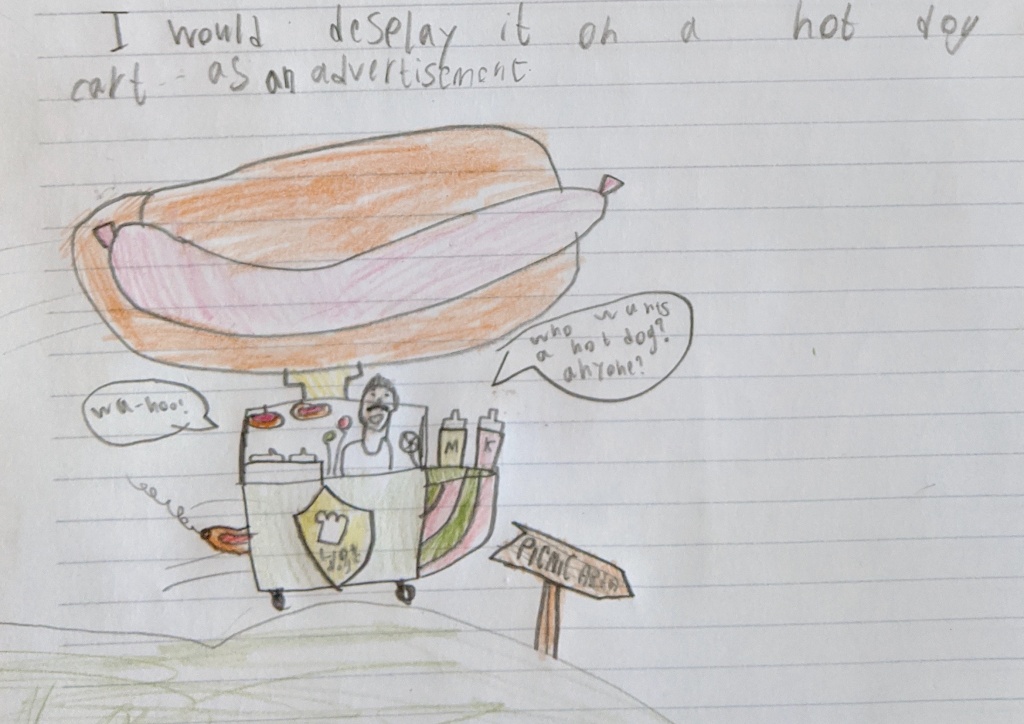
It is hard to visualize how a display of our artwork will look to the public- it is even harder to have to draw without looking at our finished sculptures!
In third and fourth grade, we managed to finish our pop art clay sculptures JUST before we moved into our first week of online school. The last part of the project is to draw an imagined environment for our sculpture, thinking about how we want visitors to see and interact with the finished work at a larger scale. We looked at the work of Claes Oldenburg to get out-of-the-box ideas for this.
I managed to get photographs of the finished sculptures on my last day at school, in hopes it would help students look at and record smaller details in their drawings. Here are a few drawings as a summary of week one, and a fairly straight-forward assignment. Stay tuned for next week and see how I attempt to teach collograph printing from home…
I am back teaching in Turkey for the semester after a long hiatus! I greatly missed this city and my students. It is a blessing to return, I feel refreshed and renewed for this next season. This semester, I am teaching elementary 3rd and 4th grade. I have not taught this group of kiddos for two years… they have grown up so much since then!
I have taught this project before, but as is true in teaching, you never teach the same thing twice! It HAS been a challenge starting out with these groups, who are split according to their language ability. One group of 3/4’s have higher, near-native English language proficiency, whereas the other, larger group of 3/4’s are English language learners (or ELLs).
Teaching ELLs in the art room has never been a huge challenge for me, as there are usually enough peer models around, and the nature of art class is very visual! Students usually do not have problems following along, even if they do not understand all of the directions for a project. I also have some background in teaching ELLs during my student teaching in Canada- I think integration of the content of art, alongside language is a perfect scenario for students to learn English!
I have found that since the two classes are grouped according to language ability, I am teaching them very differently. Keeping both groups on the same page (in terms of content) while making efforts to emphasize content language learning… this all takes a bit more thinking and additional planning!
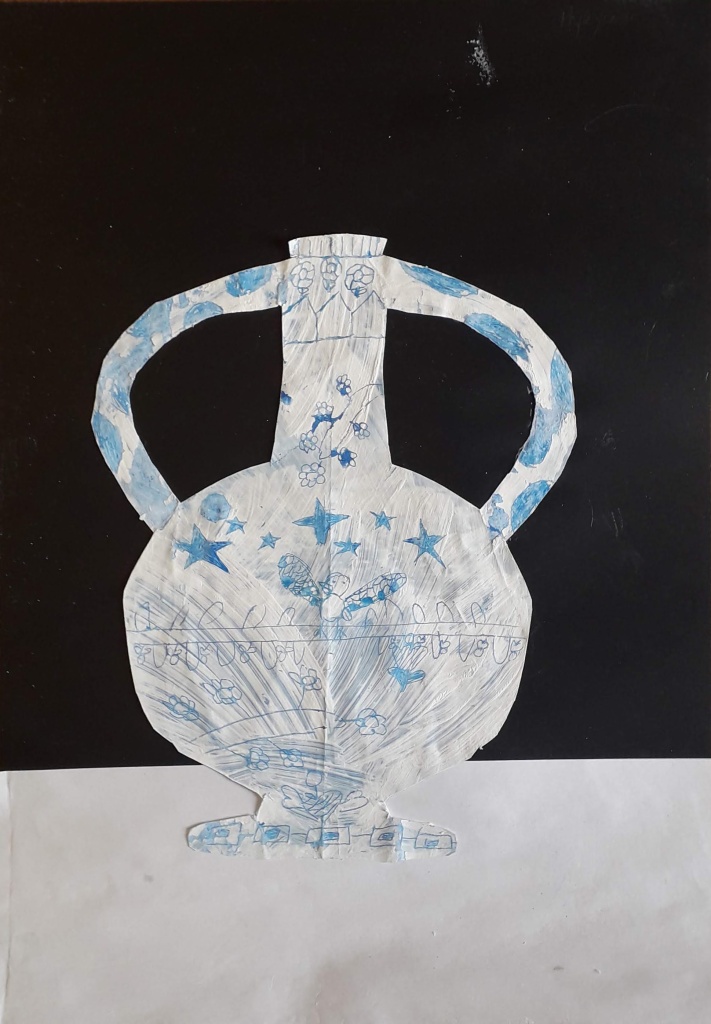
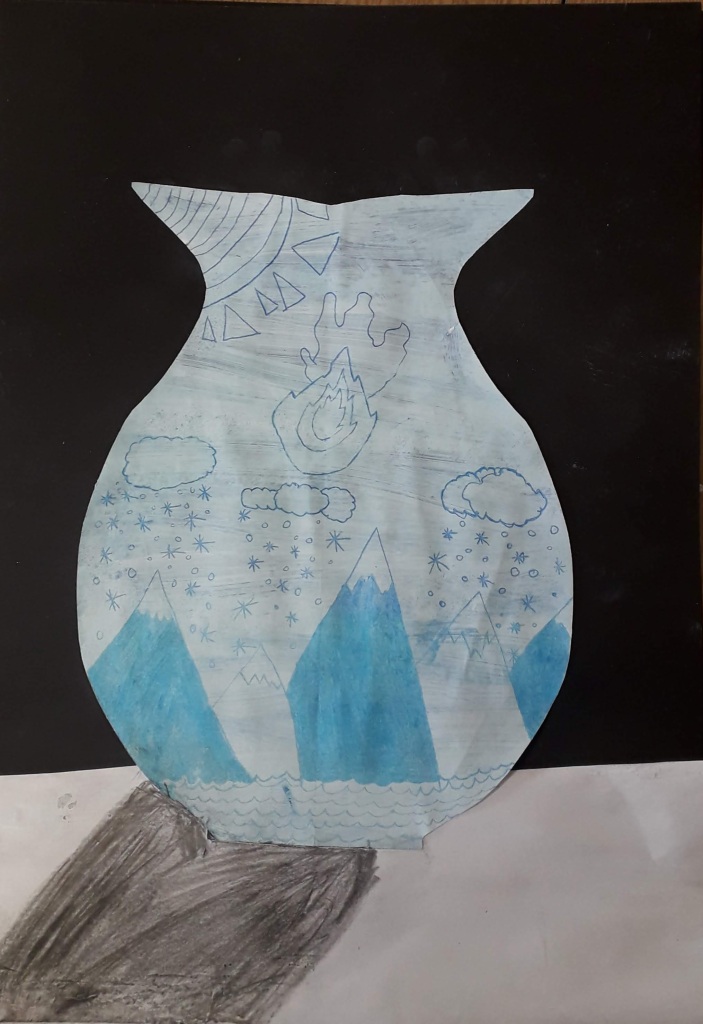
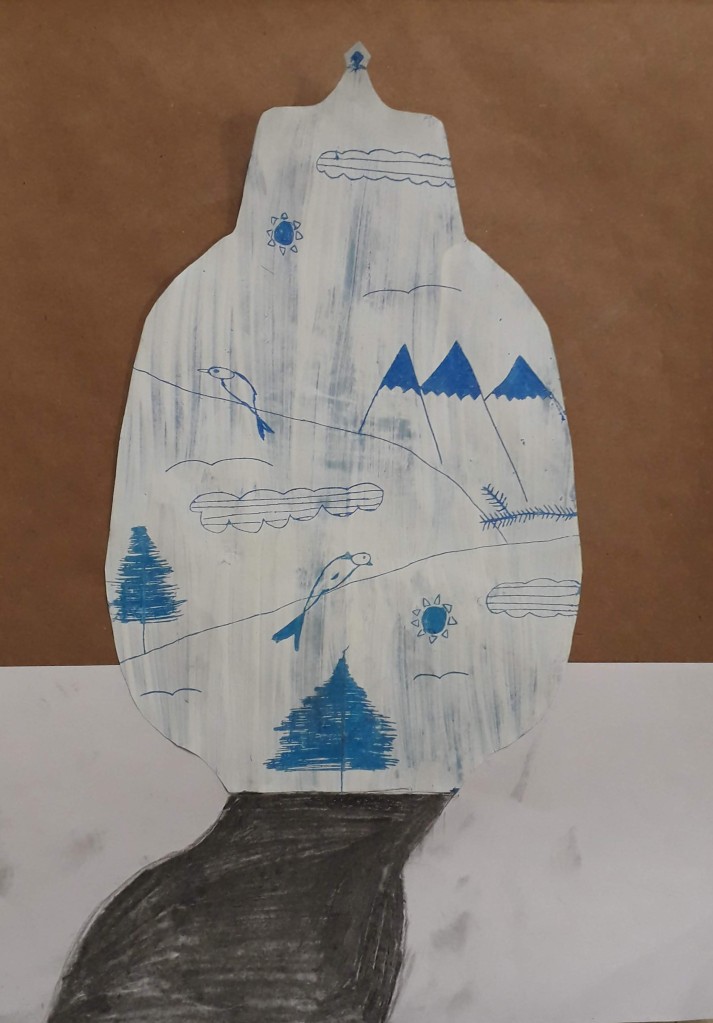
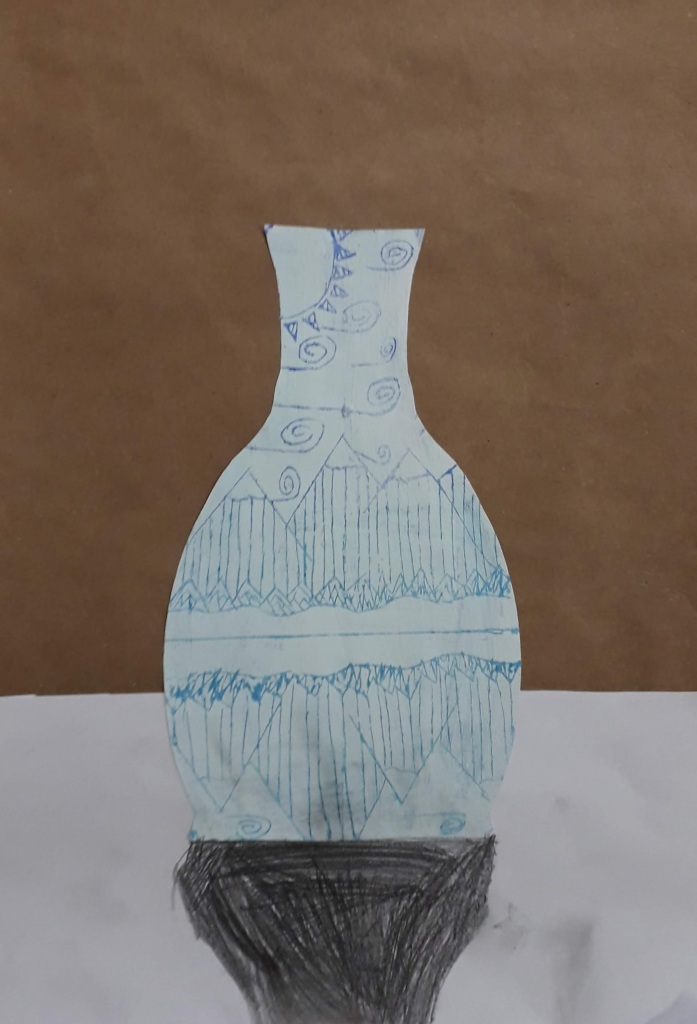
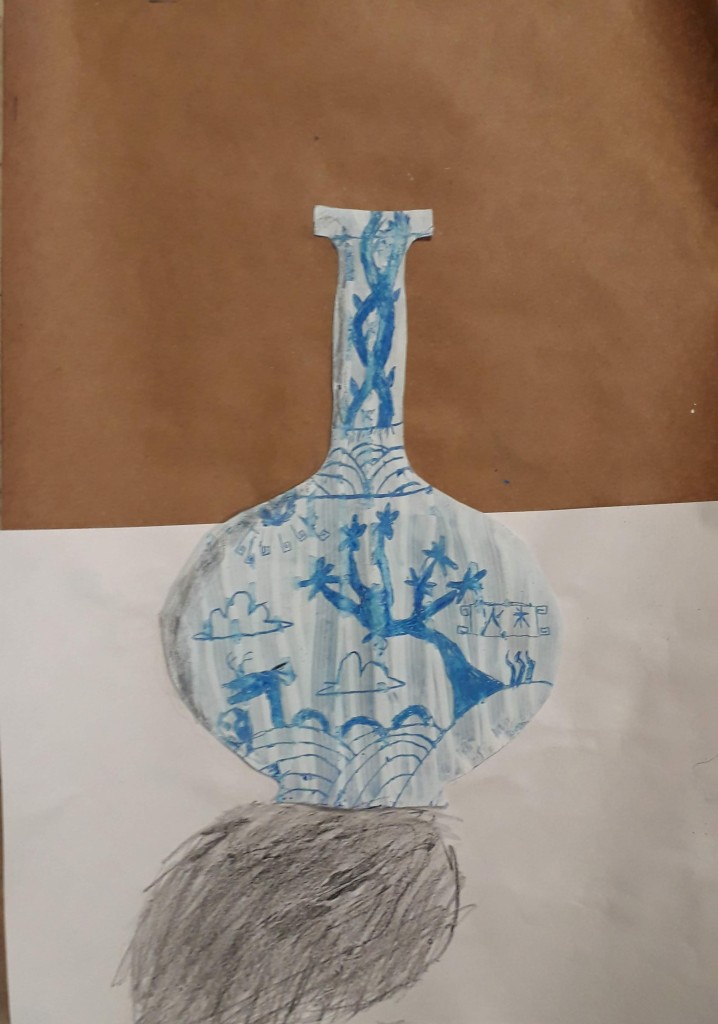
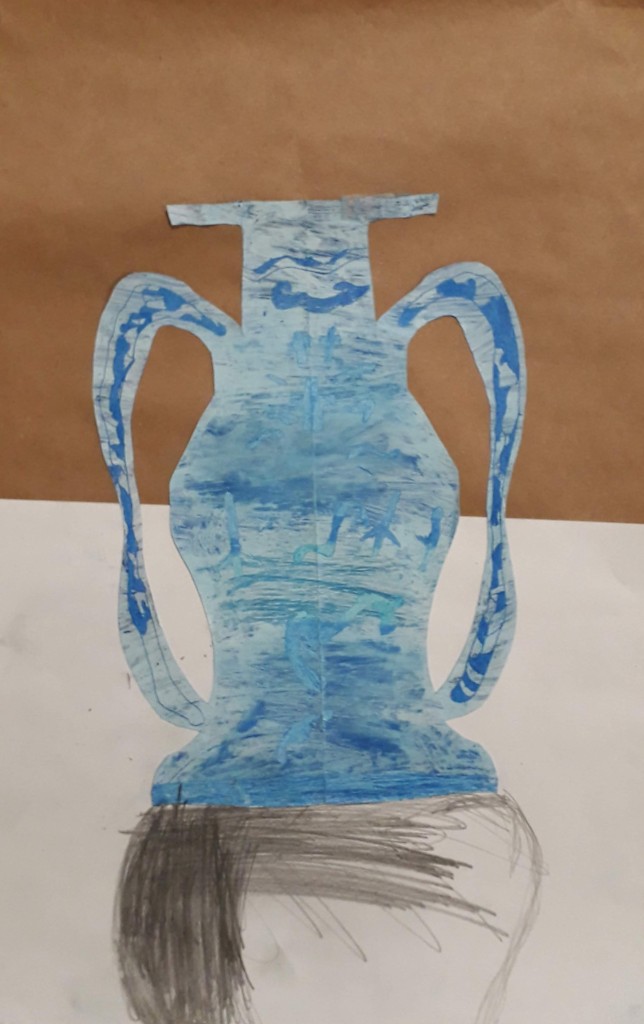
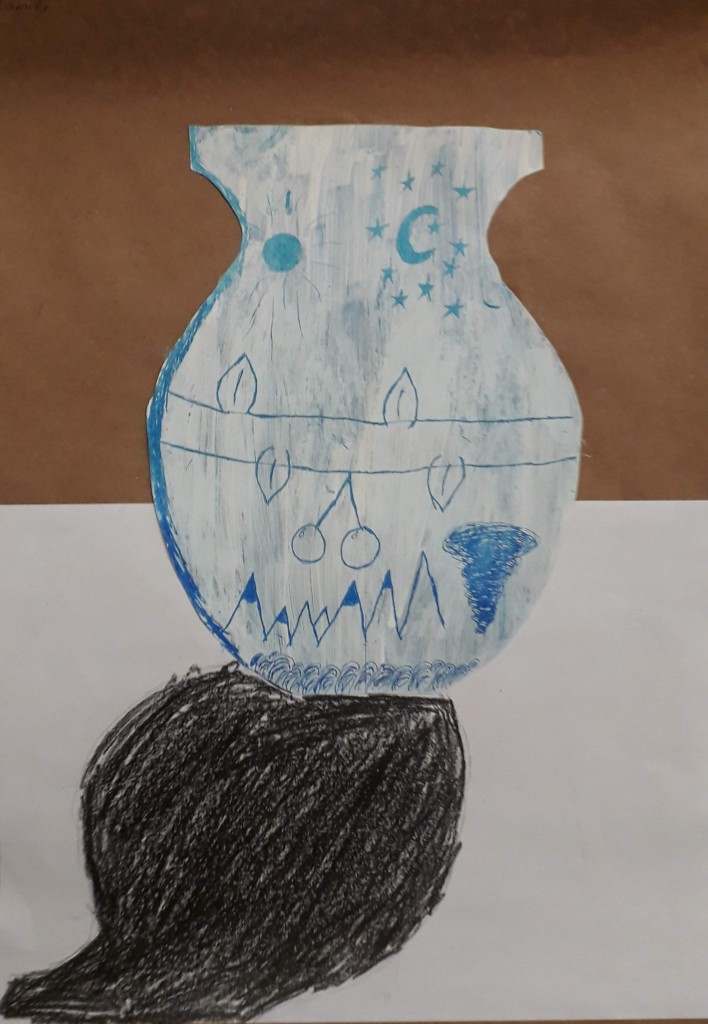
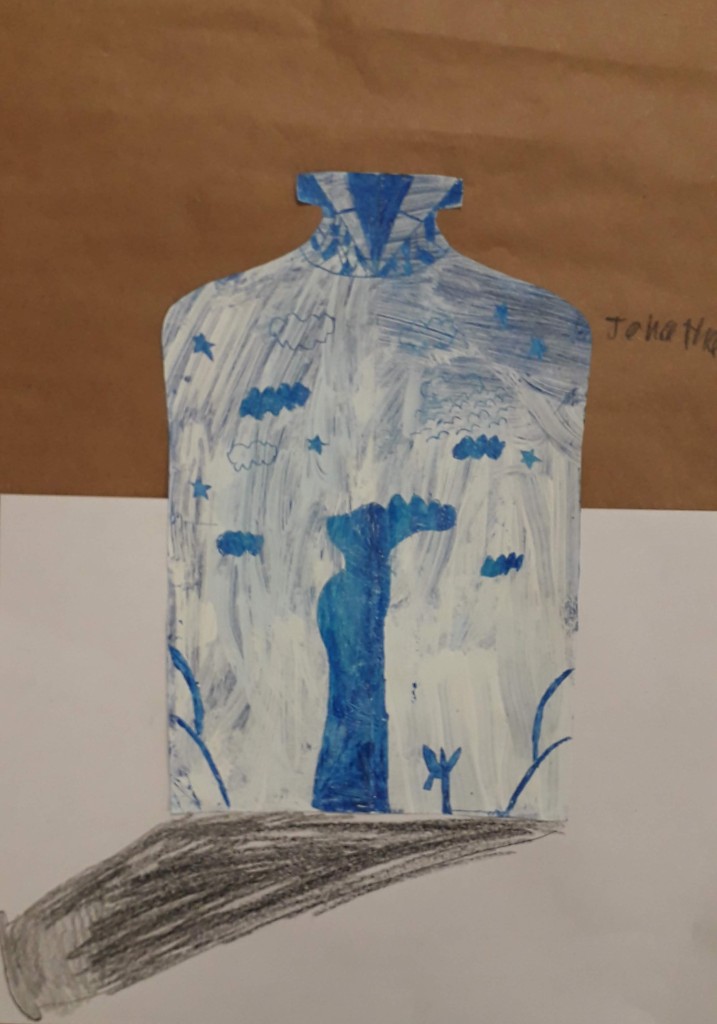
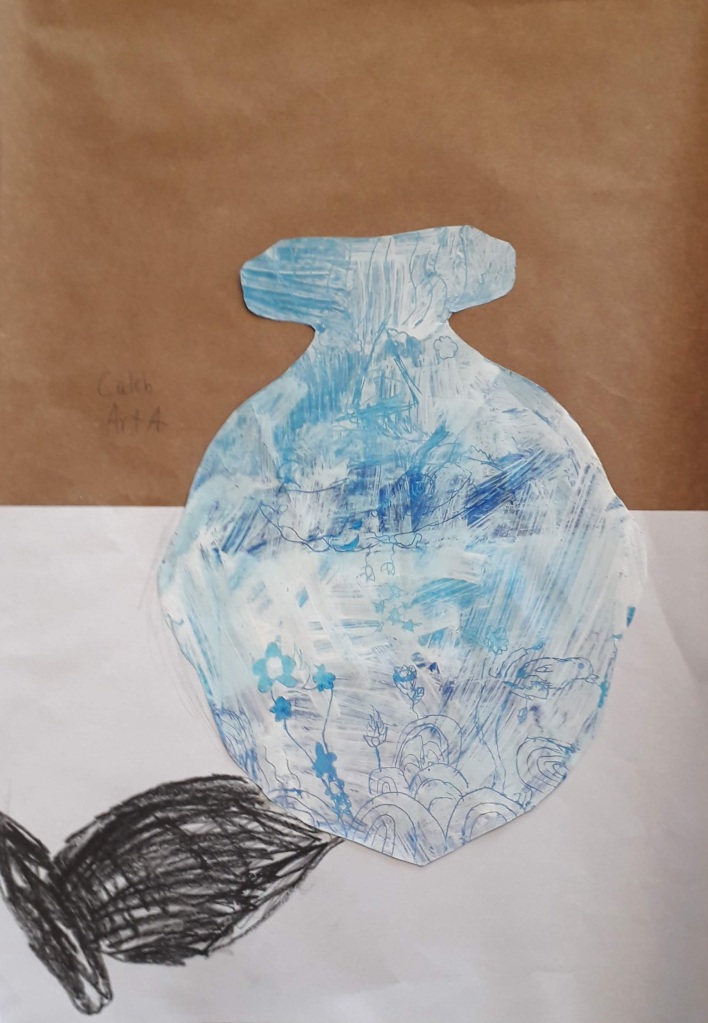
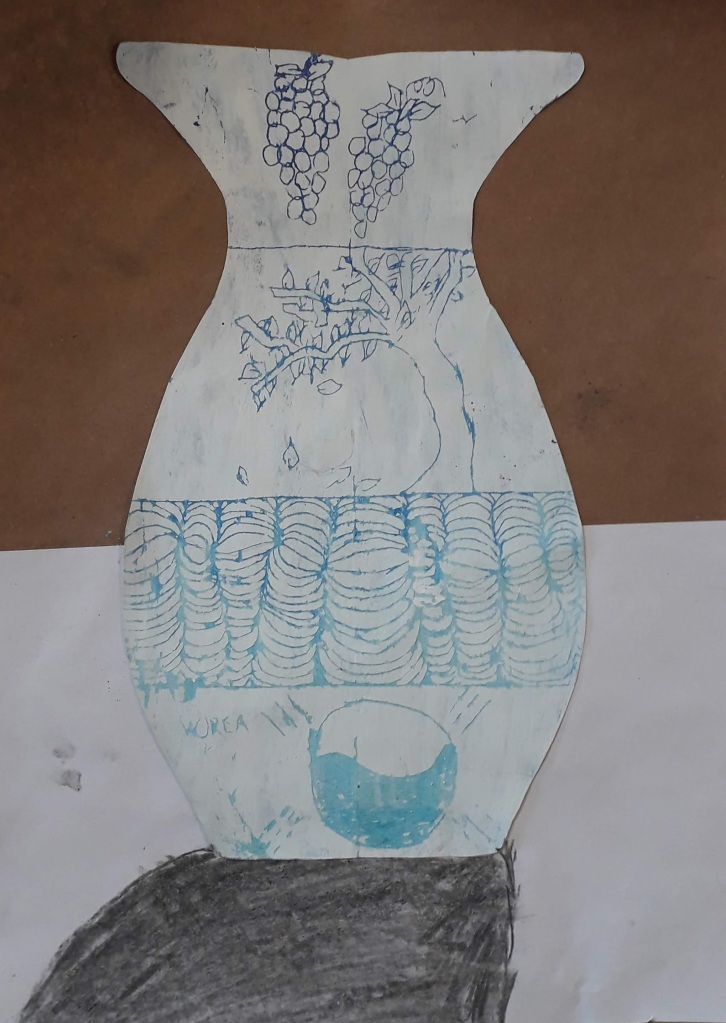
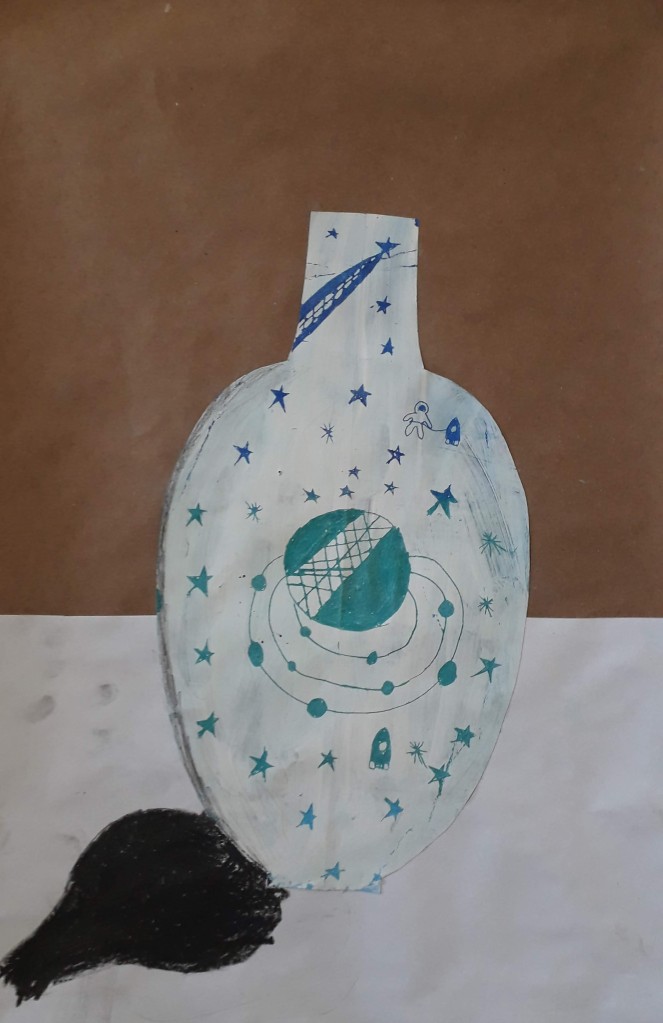
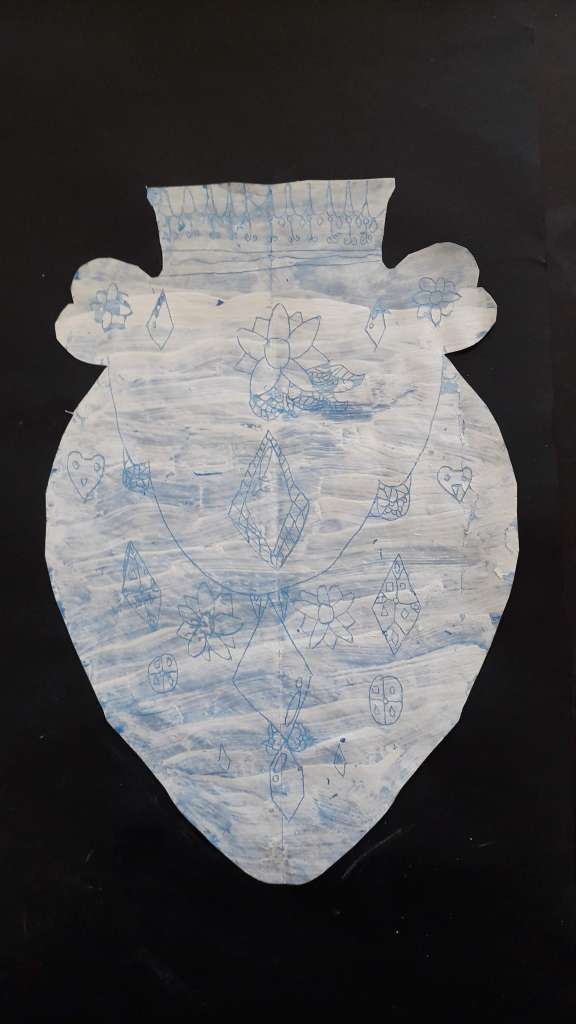
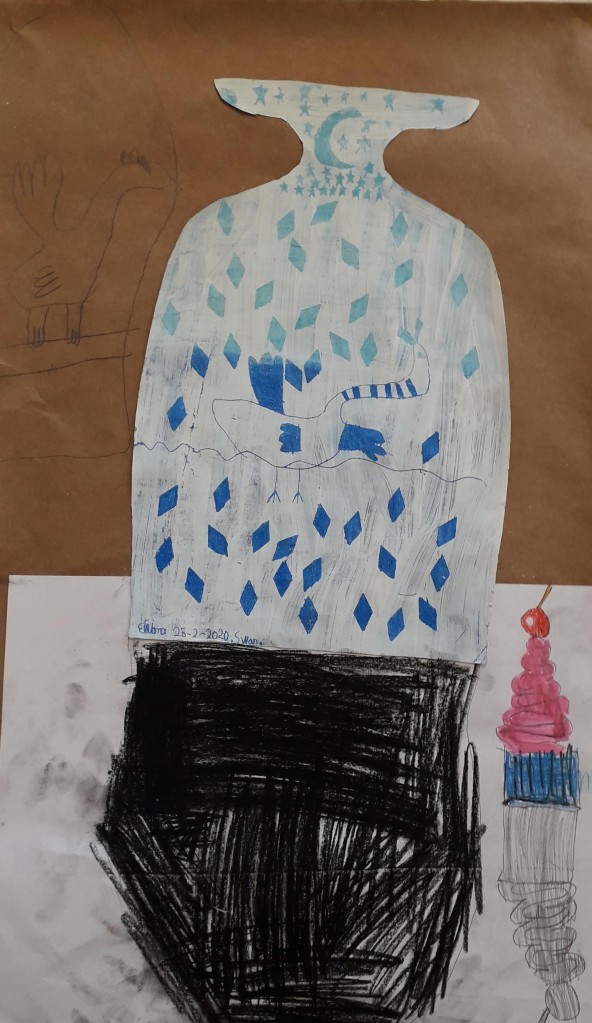
I first showed the classes a video of how porcelain Ming vases are made, from start to finish. This sequencing is important, especially as we are moving onto clay for our next project!
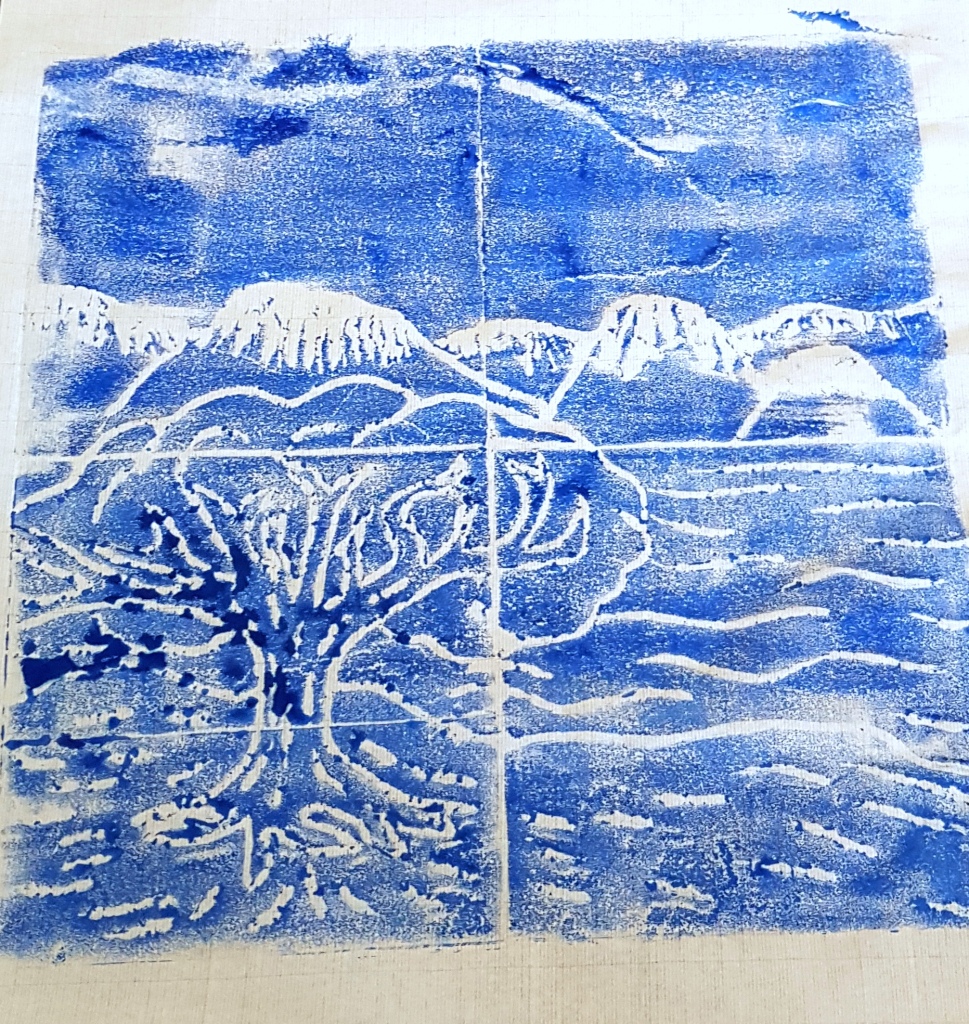
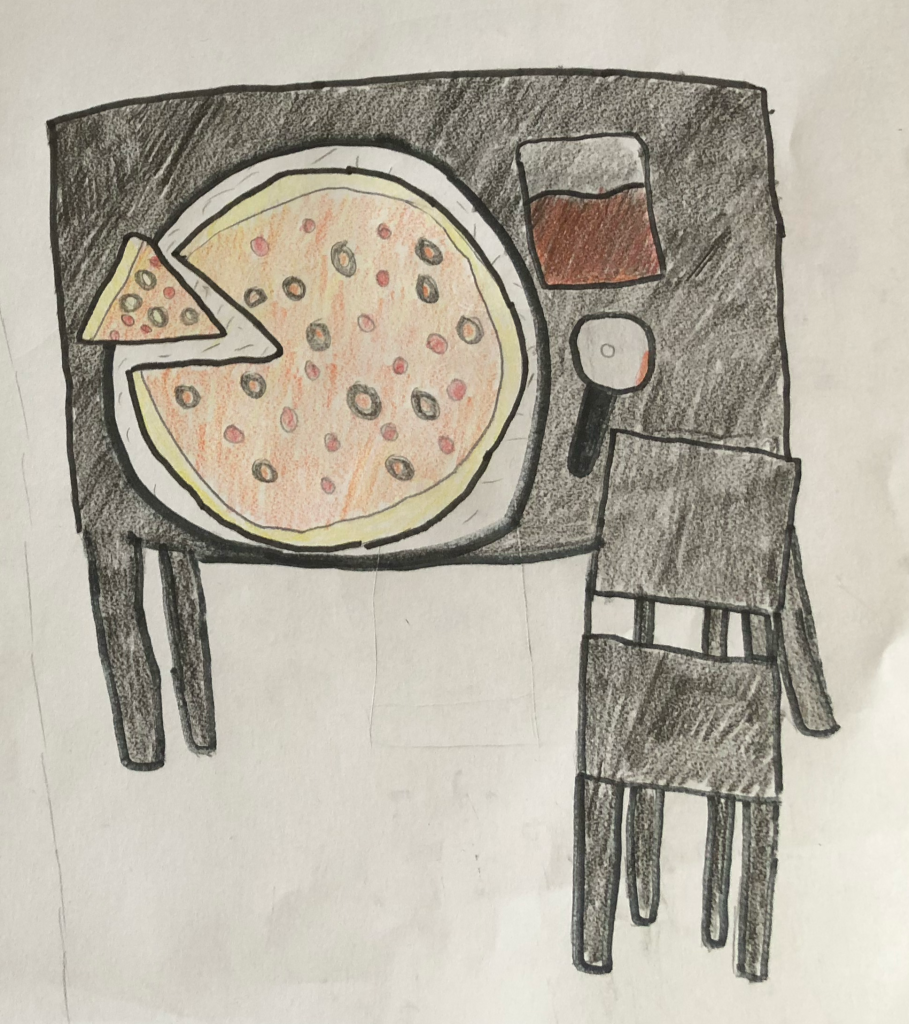
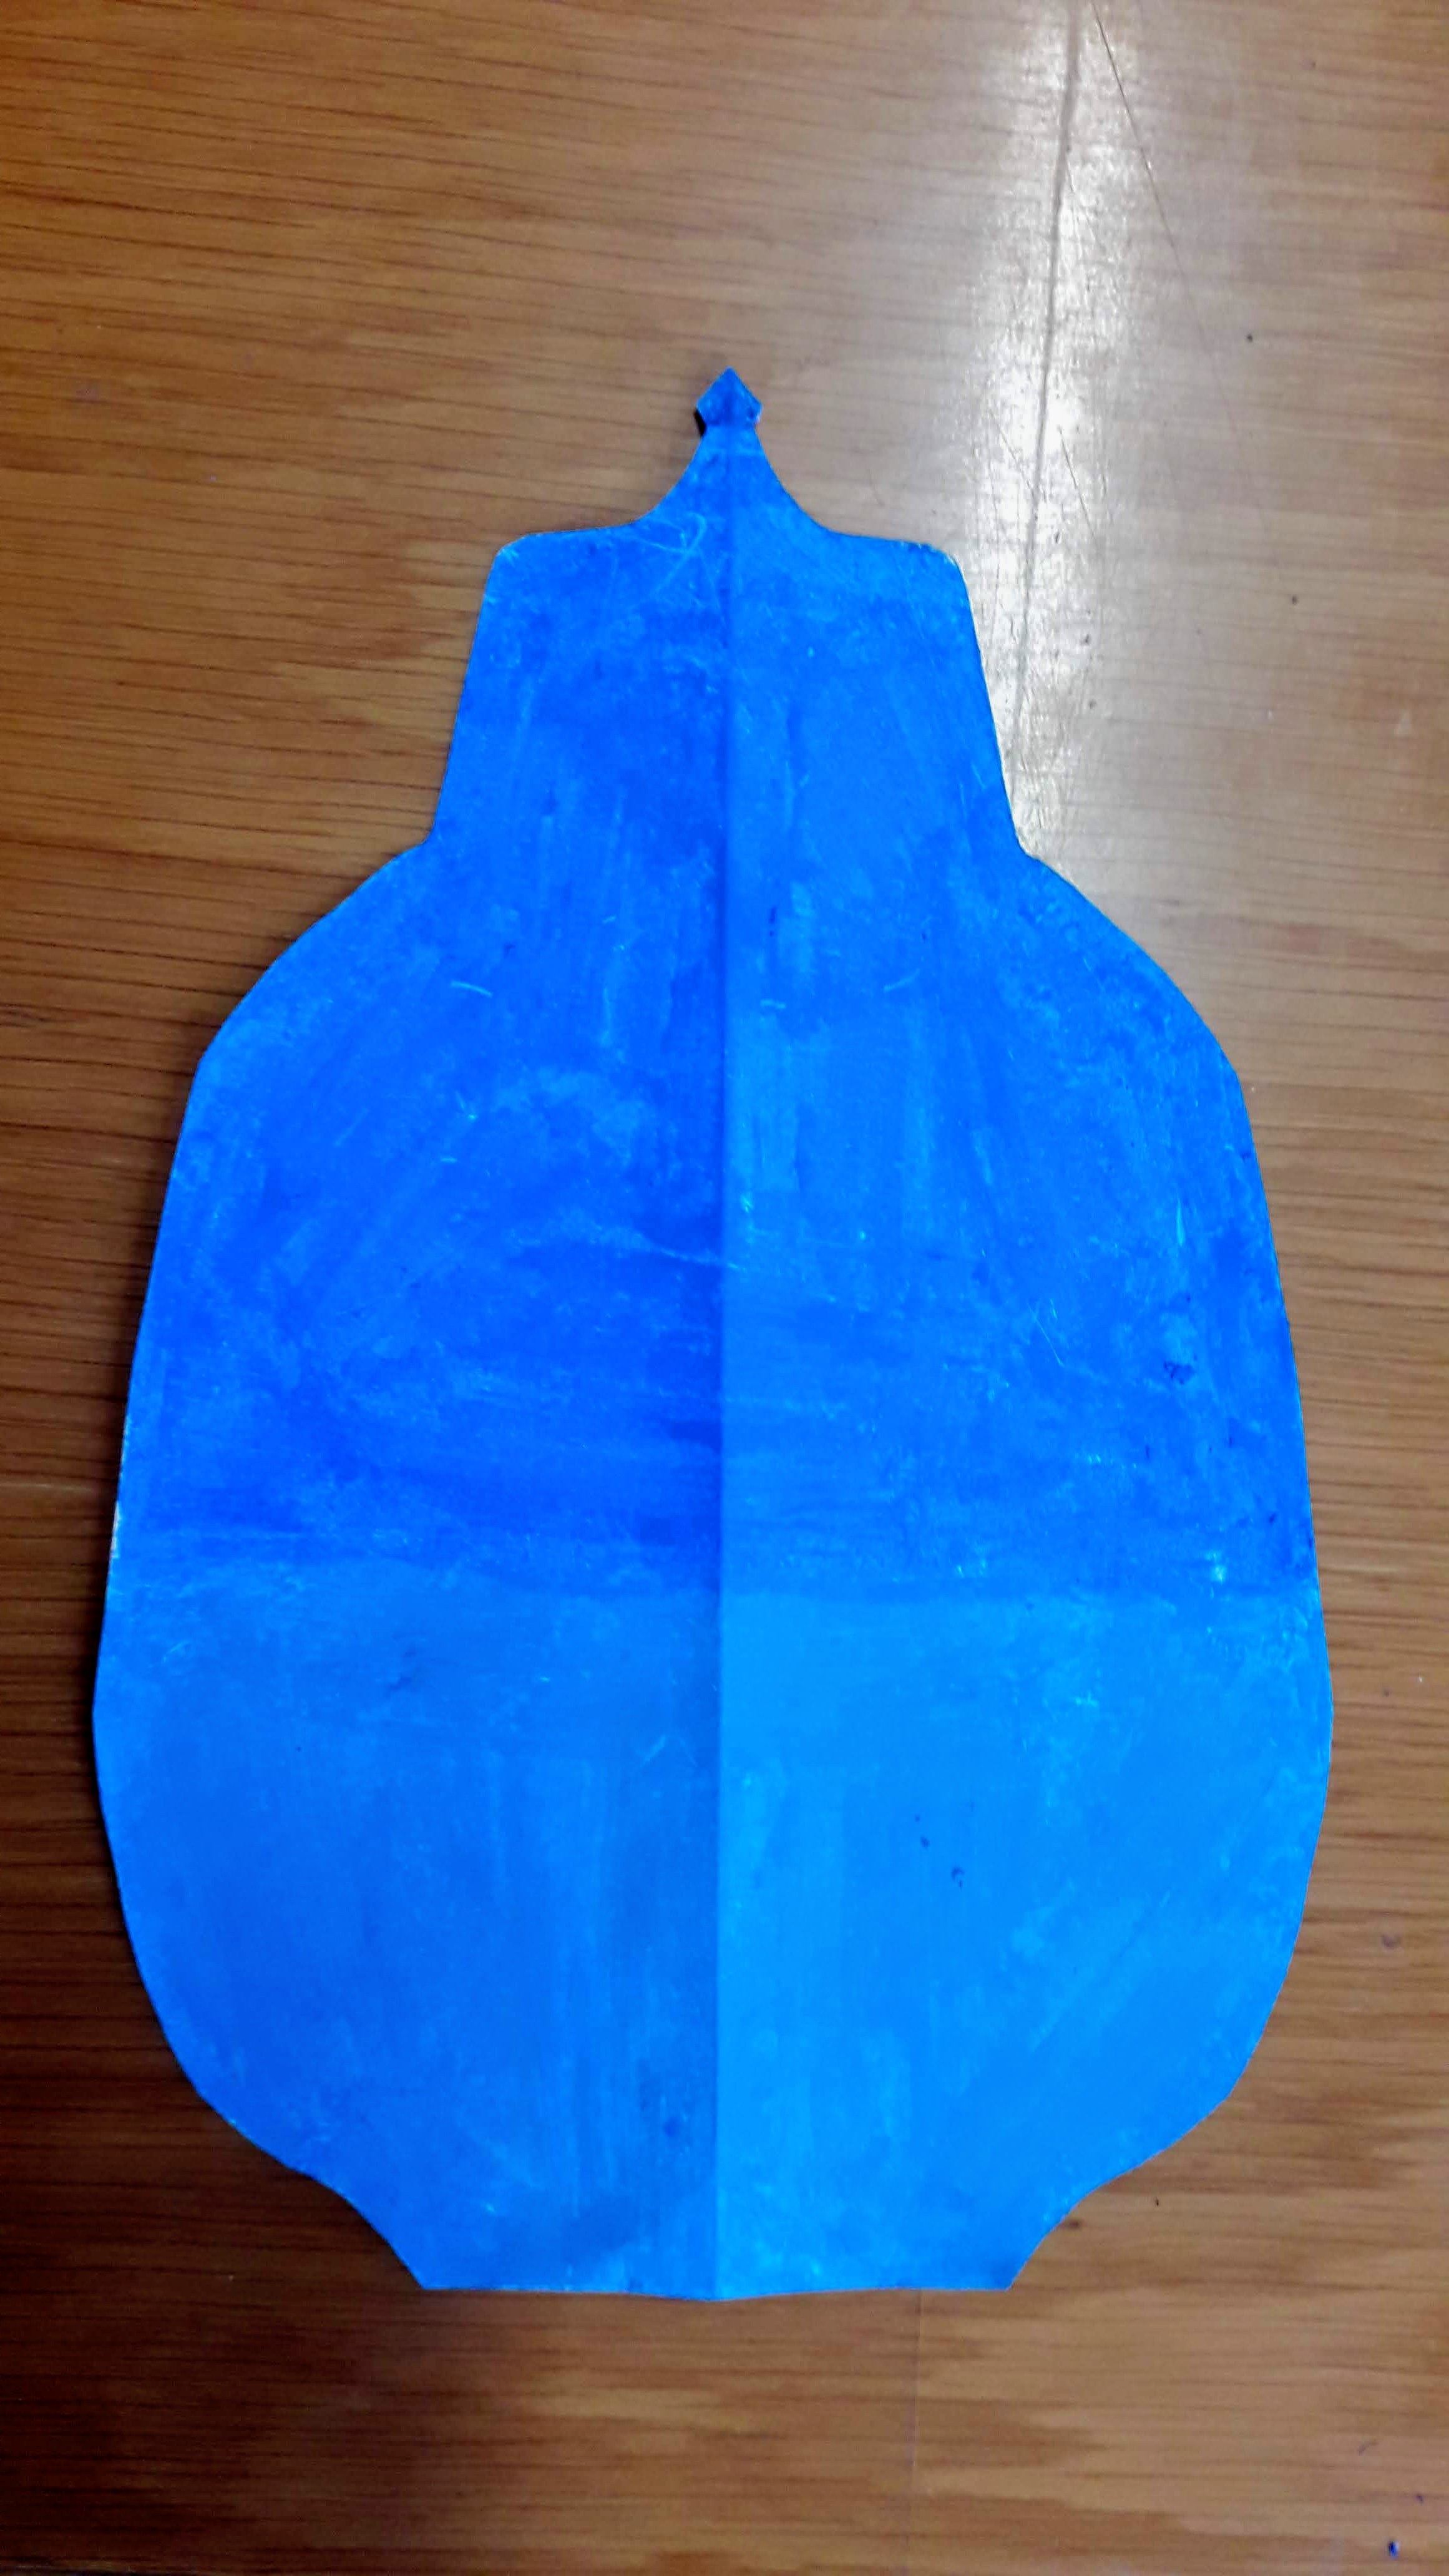
We started off with looking at different vase shapes, discussing the forms and symmetry of the different designs. I demonstrated how to create a symmetrical vase shape on A4 paper – making a hot dog fold, drawing along the edge of the fold to create an outline and cutting it out so the two sides of the vase are the same.
Step One- Fill in the silhouette shape with different values and shades of blue oil pastel
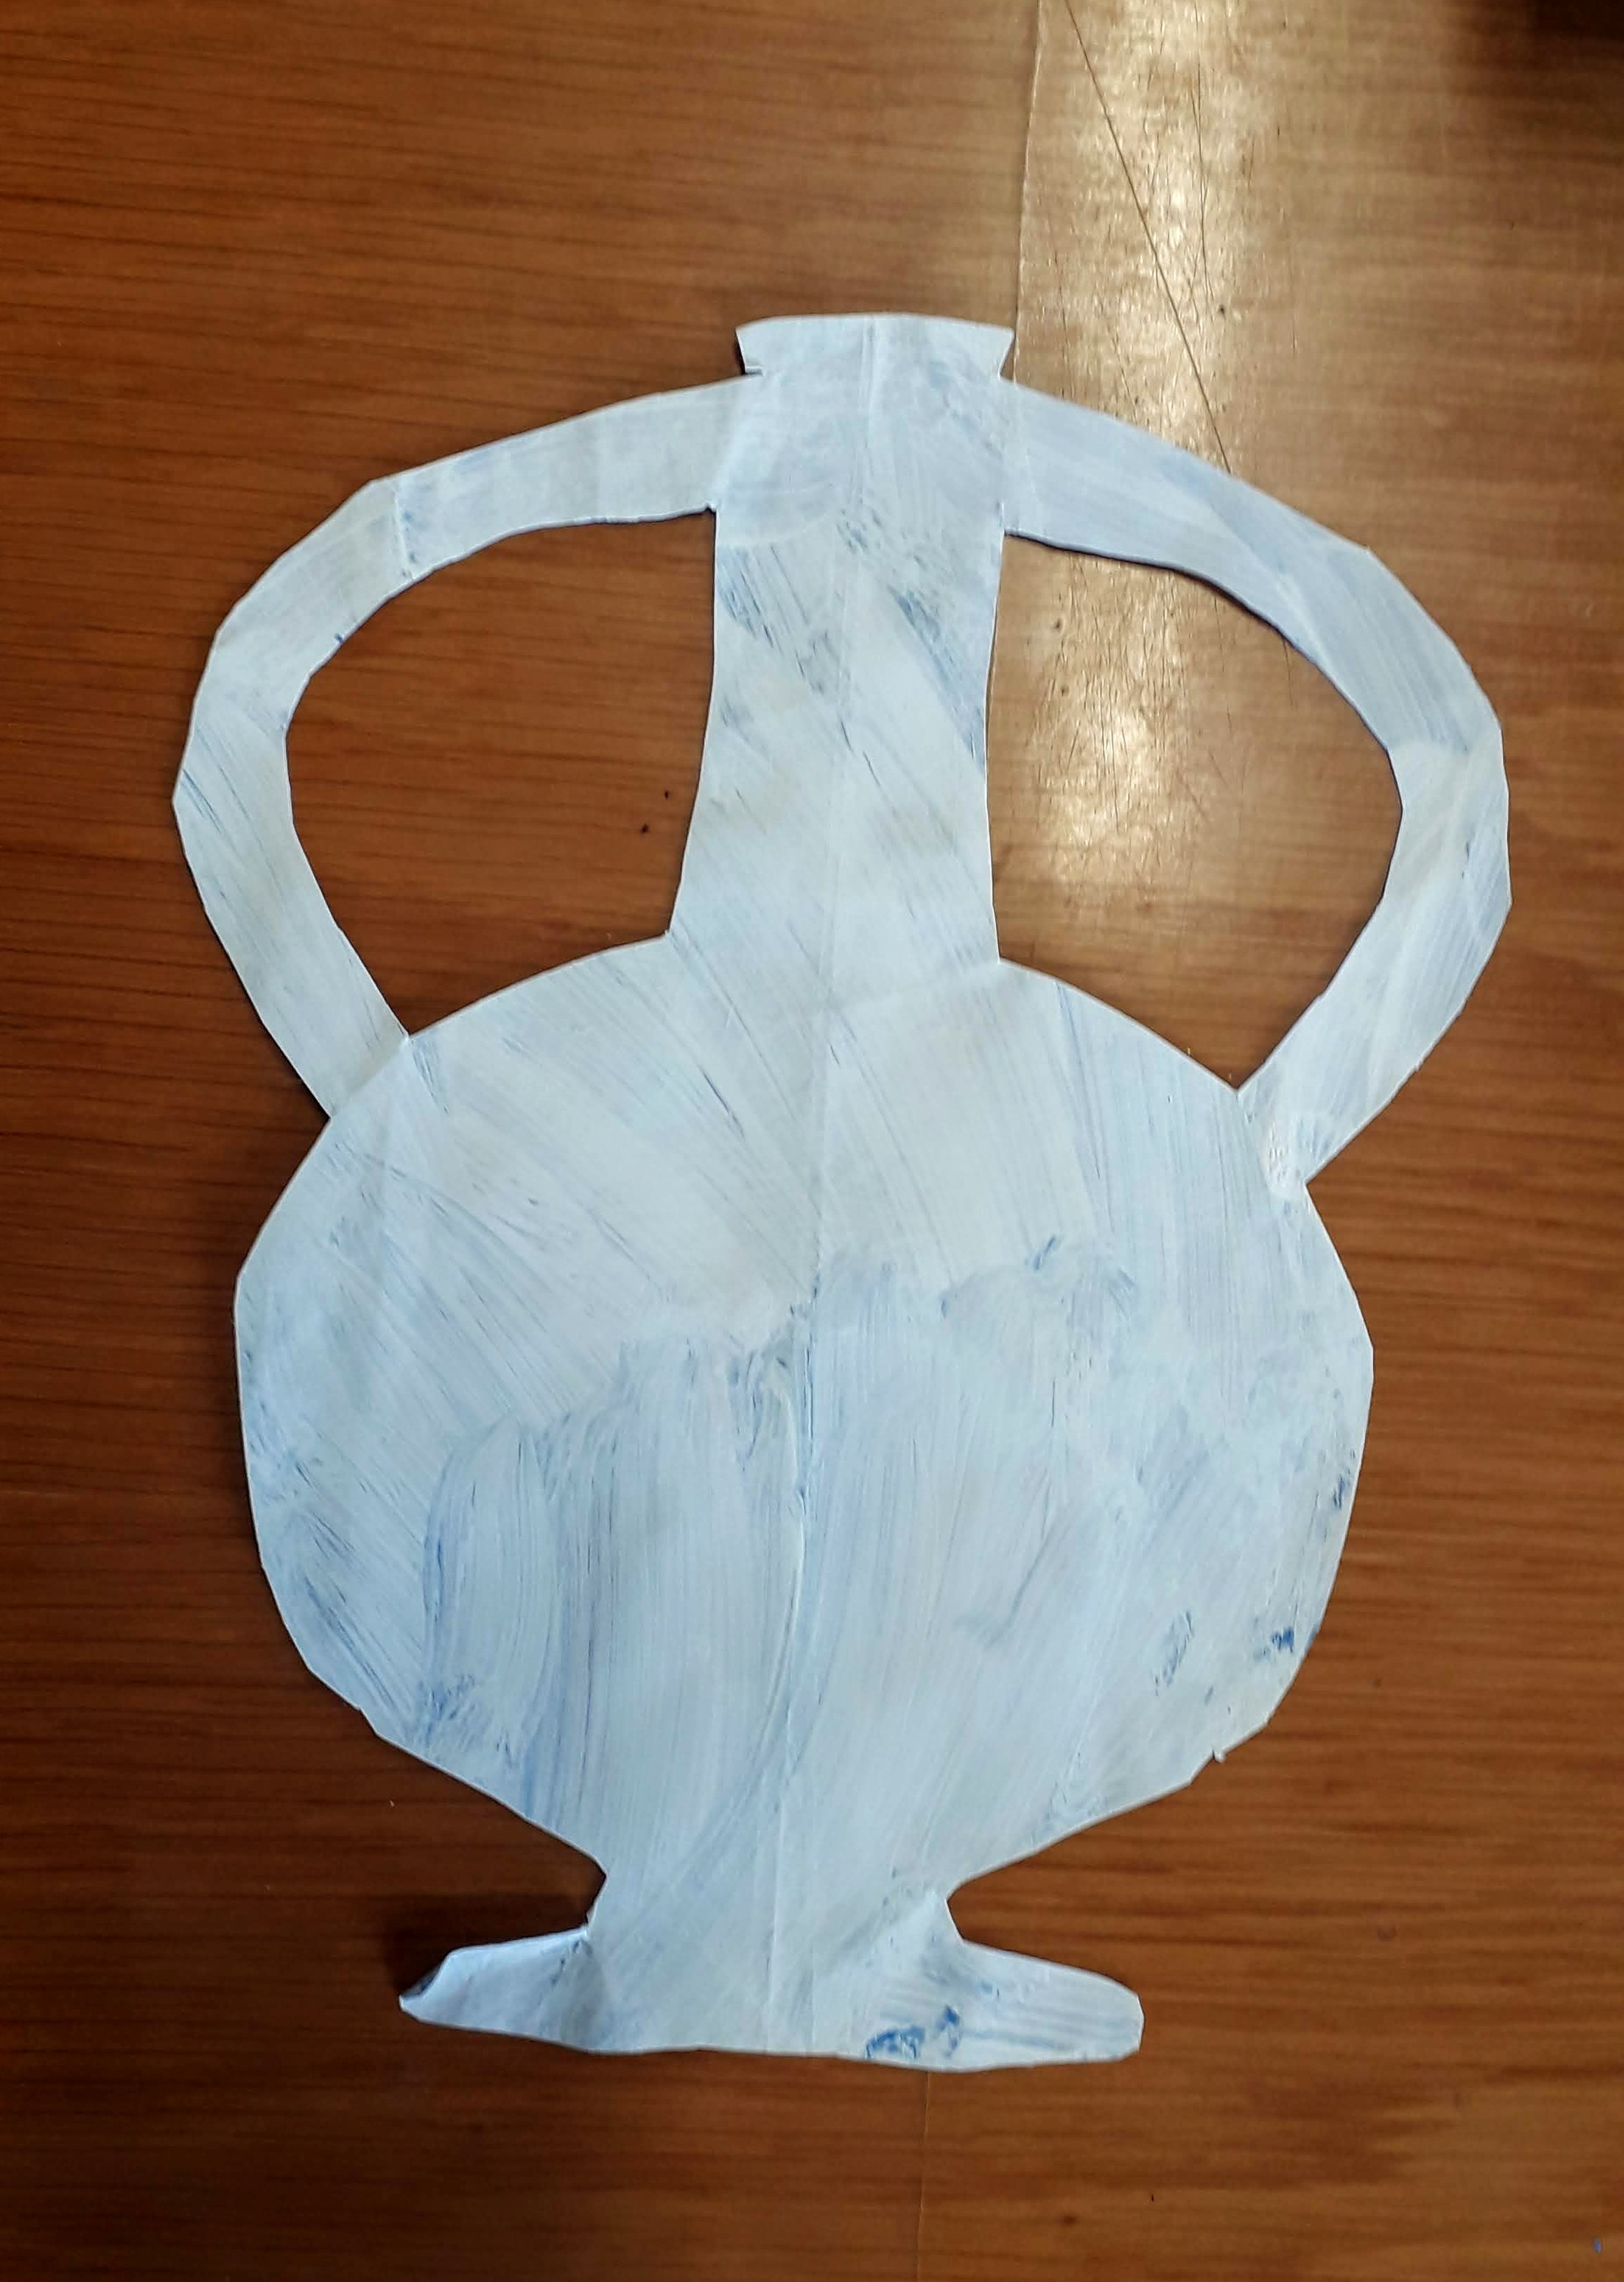
Step Two- Paint overtop of the blue with a layer of white tempera paint mixed with soap (this is so the paint sticks better to the oily pastel layer)
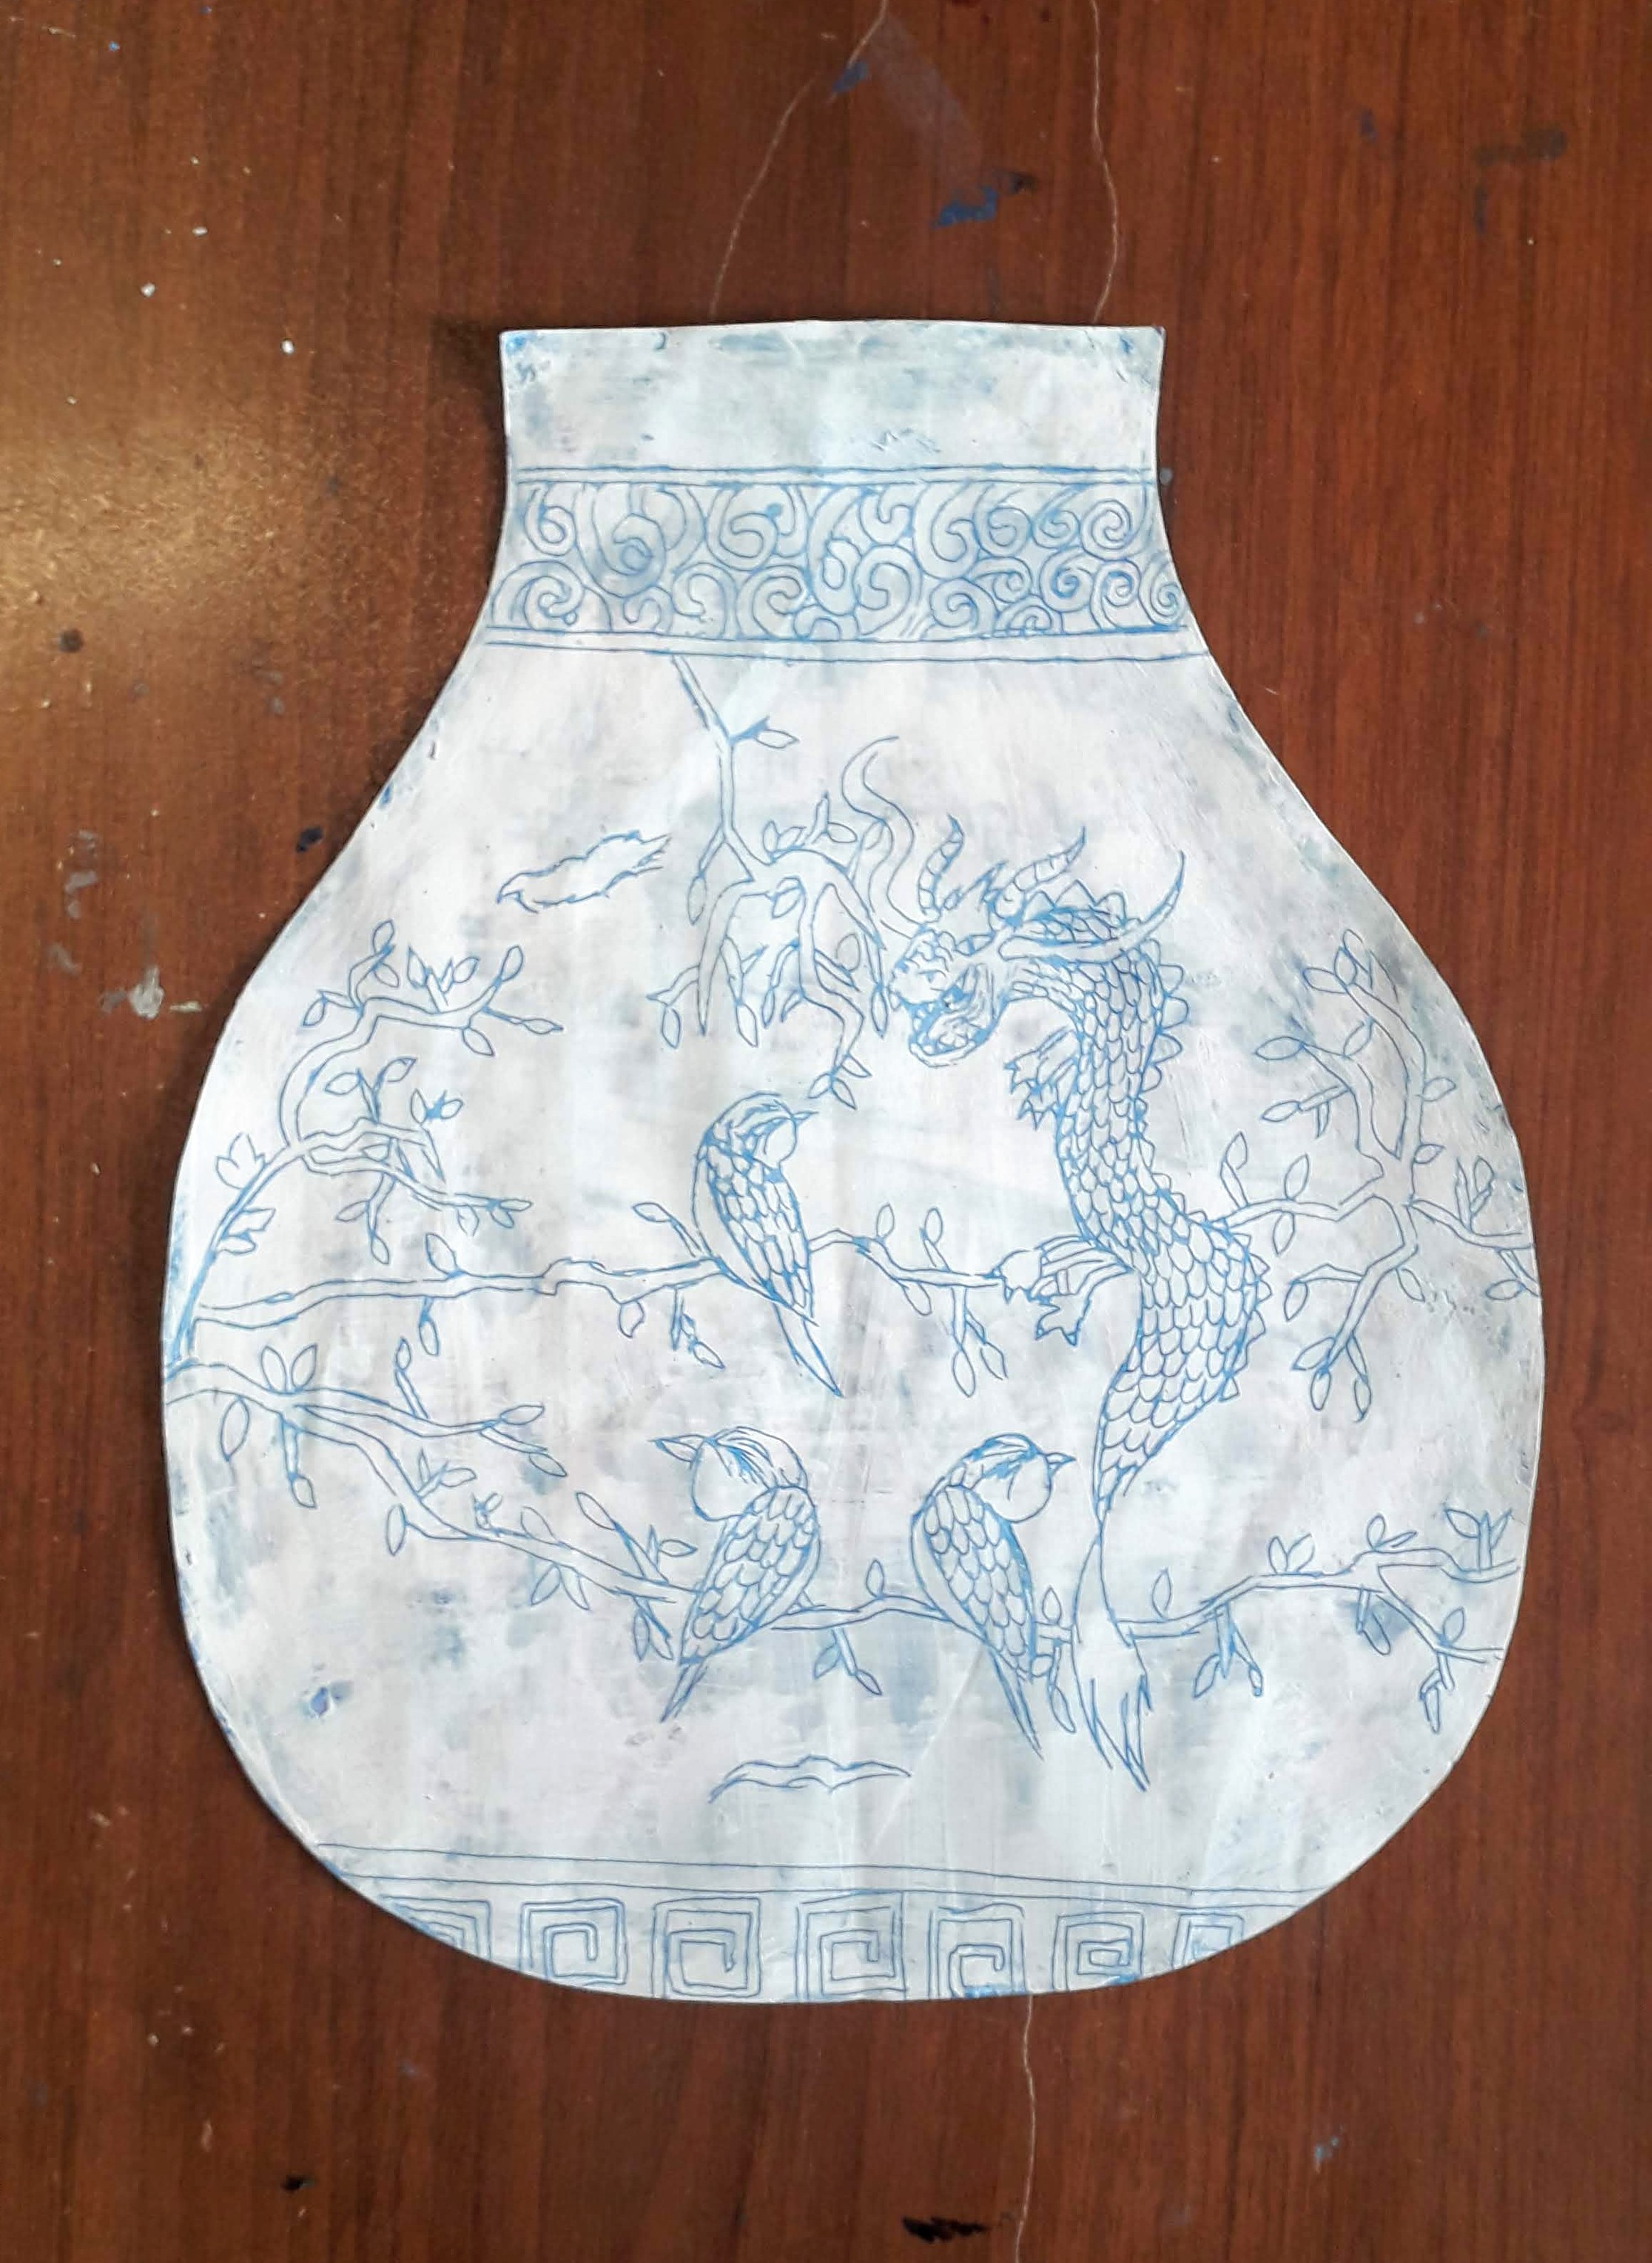
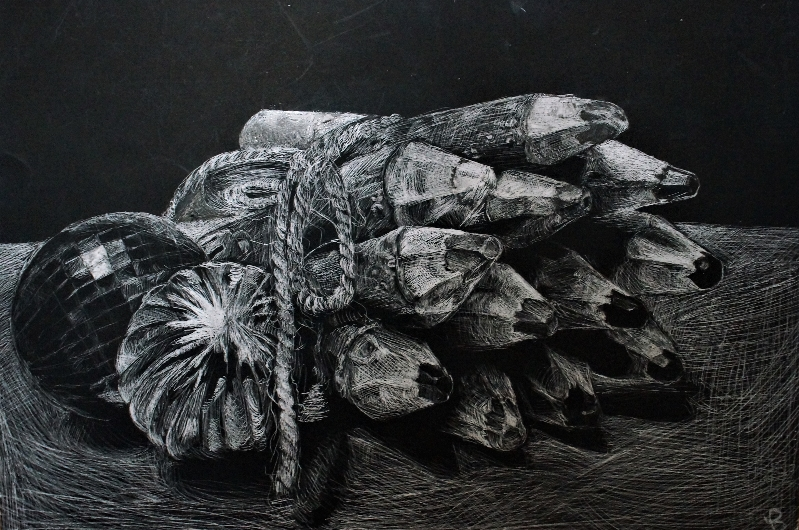
Step Three- Scratch a design through the layer of white paint and reveal the blue underneath
We spent some time looking at and discussing the different imagery used to decorate Ming vases. We talked about symbolism and possible big ideas that are being communicated through the work. We learned that the artisans use cobalt to draw onto the vases before they are fired, and only after coming out of the kiln do the designs turn out blue!
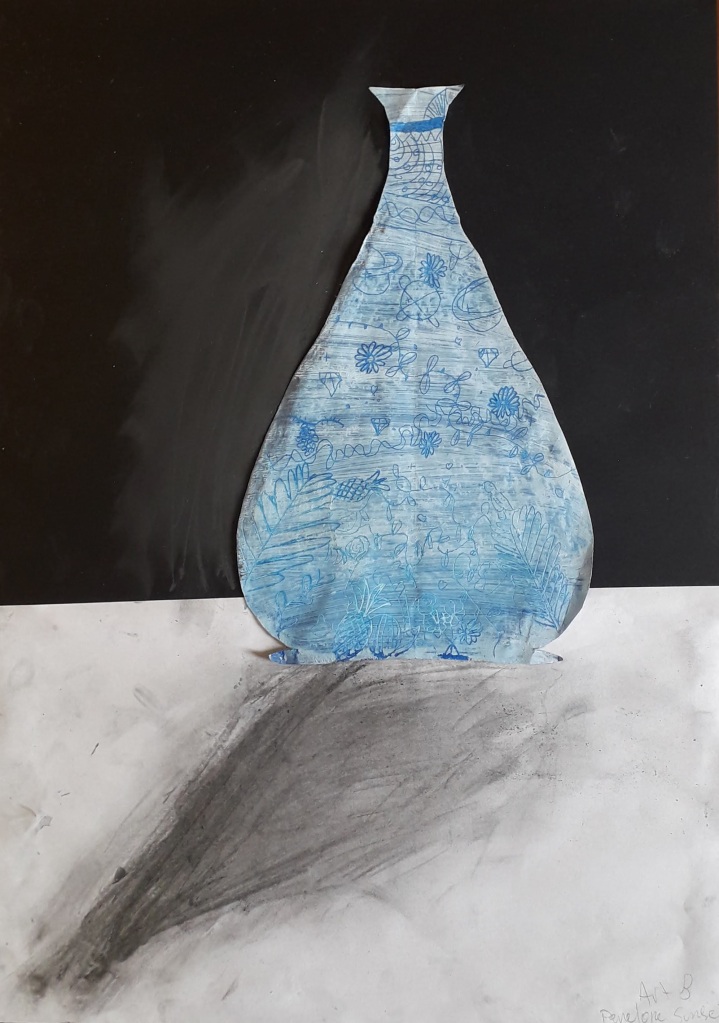
After planning in their sketchbooks, students began scratching their designs onto their vases. Finished designs were mounted onto black or brown paper. Another challenge I am facing now more than ever, is having students all on very different steps of a project. Early finishers had the opportunity to add a table surface and an indication of light and shadows on their vases. They drew in the shadows using graphite. I did not give them very much instruction on this, it was insightful to see how they all interpreted this differently on their own!
This student does not know it yet, but their creative addition helps connect this piece with our next project!
I am in a very reflective mood. This year, I taught my fourth group of AP artists. It is SO good for me as an educator to see how far I have come in my abilities to teach and mentor students at this level. I could not be more proud of these girls and the hard work they put in for the scores they received.
Throughout this year (and second semester in particular), I aimed to make the class really special, and to cultivate a collaborative learning environment beneficial for both me and my students. I knew this might be my last time teaching the class for a while!
I thought I would share a few of my favourite projects over the years- the AP art program is going through some big changes this next year, so I may not have the chance to use these again!
3 Tone Still Life: Metal & Eggs
Kara Walker inspired Illustration of a Social Issue